说明
机械臂末端执行器的种类很多,目前针对目标抓取最常使用的末端执行器就是夹抓和真空吸盘式。但是在gazebo仿真中,需要对抓取目标模型进行摩擦等物理属性进行设置,同时对机械臂的碰撞检测也需要进行一个调整,这个过程对与不熟悉ros仿真和gazebo模型设置的人来说是比较痛苦的,因此,我在本文介绍一种在工业上也经常使用的vacuum。

不了解vacuum的可以看一下这个视频,在这个ur5机械臂上安装了9组vacuum,对传送带上的目标进行抓取。
安装vacuum
是的,在配置好ros和gazebo插件后,就不需要单独再去安装vacuum!
vacuum已经集成在了gazebo的插件中,名称叫做:libgazebo_ros_vacuum_gripper.so。需要使用就在xacro模型文件中直接调用即可。
调用代码
在你的机械臂的xacro模型文件中,像增加link和joint一样的方式使用:
 <link name="vacuum_gripper">
      <gravity>0</gravity>
      <visual>
        <origin rpy="0 0 0" xyz="0 0 0"/>
        <geometry>
          <cylinder radius="0.005" length="0.01"/>
        </geometry>
        <material name="transparent">
          <color rgba="0 0 0 0"/>
        </material>
      </visual>
      <inertial>
        <origin rpy="0 0 0" xyz="0.000000 0.000000 0.000000"/>
        <mass value="0.0001"/>
        <inertia ixx="1e-08" ixy="0" ixz="0" iyy="1e-08" iyz="0" izz="1e-08"/>
      </inertial>
    </link>

    <joint name="gripper_joint" type="revolute">
      <axis xyz="1 0 0" />
      <parent link="link6" />
      <child link="vacuum_gripper" />
      <origin rpy="0 1.5708 0" xyz="${vac_x} 0.0125 0" />
      <limit effort="50" velocity="50" lower="0" upper="0" />
      <dynamics damping="0.0" friction="10"/>
    </joint>

  <gazebo>
      <plugin name="gazebo_ros_vacuum_gripper" filename="libgazebo_ros_vacuum_gripper.so">
        <robotNamespace>/arm/vacuum_gripper</robotNamespace>
        <bodyName>vacuum_gripper</bodyName>
        <topicName>grasping</topicName>
        <maxForce>50</maxForce>
        <maxDistance>0.05</maxDistance>
        <minDistance>0.01</minDistance>
      </plugin>
  </gazebo>
首先建立一个叫做vacuum_gripper的link,link_name是这个vacuum的名字,你可以在一个末端中增加多个vacuum的link,这样可以提升吸附能力。
parent link是机械臂最后一个关节的名字,然后通过xyzrpy确定这个vacuum的位置。
在plugin标签中,主要设置的话题名称是grasping,这个话题中包含了工作状态信息:on/off。
随后,再设置对应的gazbeo参数:
<gazebo reference="vacuum_gripper">
            <mu1>50</mu1>
            <mu2>50</mu2>
       <minDepth>0.003</minDepth>
            <maxVel>0</maxVel>
            <kp>1000000.0</kp>
            <kd>1.0</kd>
            <material>Gazebo/Grey</material>
</gazebo>
在这设置了vacuum在gazebo仿真中的一些物理属性,这些数值是我自己给出的,不一定是最佳设置,大家参考即可,因为这部分确实不是很好调,如果有人有好的方法,请在评论中赐教。
这时候,对一个vacuum在模型文件中的全部设置就已经完成了。

使用方法
完成以上模型文件的设置,仅仅是将vacuum安装到了机械臂末端上,此时vacuum处于off状态,并不能进行抓取,还需要配置两个文件,一个是vacuum_control.py和一个发送开关指令的vacuum_switch.py。
其中vacuum_control.py是订阅开关程序发布的指令然后去控制vacuum的on/off:
#!/usr/bin/env python
import rospy, sys, numpy as np
import geometry_msgs.msg
import moveit_msgs.msg
from ur5_notebook.msg import Tracker
from std_msgs.msg import Header
from std_msgs.msg import Bool
from std_srvs.srv import Empty
def gripper_status(msg):
    if msg.data:
        return True
        # print('gripper status = {}'.format(msg.data))
def gripper_on():
    # Wait till the srv is available
    rospy.wait_for_service('/arm/vacuum_gripper/on')
    try:
        # Create a handle for the calling the srv
        turn_on = rospy.ServiceProxy('/arm/vacuum_gripper/on', Empty)
        # Use this handle just like a normal function and call it
        resp = turn_on()
        return resp
    except rospy.ServiceException, e:
        print "Service call failed: %s" % e
def gripper_off():
    rospy.wait_for_service('/arm/vacuum_gripper/off')
    try:
        turn_off = rospy.ServiceProxy('/arm/vacuum_gripper/off', Empty)
        resp = turn_off()
        return resp
    except rospy.ServiceException, e:
        print "Service call failed: %s" % e
def trigger(msg):
    gripper_trigger = msg.flag2
    if gripper_trigger:
        gripper_on()
  else:
        gripper_off()
rospy.init_node("arm_gripper", anonymous=False)
gripper_status_sub = rospy.Subscriber('/arm/vacuum_gripper/grasping', Bool, gripper_status, queue_size=1)
cxy_sub = rospy.Subscriber('switch', Tracker, trigger, queue_size=1)
rospy.spin()
代码很简单,我就不带着大家读了。
接下来是发布开关的程序,思想就是根据控制程序中需要订阅的话题去编写一个发布器,将这个话题在你需要的时候发布一个布尔型变量即可,每个人的on/off条件不同,所以我给出发布器的部分程序:
def talker():
    track = rospy.Publisher('switch', Tracker, queue_size=1)
    rospy.init_node('vacuum_control',anonymous=True)
    r = rospy.Rate(10)
    while not rospy.is_shutdown():
        tracker.flag2 = 1
        track.publish(tracker)
        r.sleep()
if __name__ == '__main__':
    try:
        talker()
    except rospy.ROSInterruptException:pass
这部分程序是发布了一个值为true的话题,这用控制程序订阅后,就会启动vacuum。
当然,想关闭vacuum,就设置tracker.flag2 = 0 即可。
效果展示
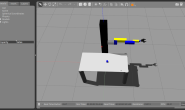
最后,结合之前的教程,在实现二维码跟踪的基础上,加入了vacuum末端,跟踪到二维码后,再对其进行一个抓取实验,可以看到视频中我多次调整机械臂的位置,令其在一个合理的位置进行吸附。


