0x00 概述
在前面的教程中,一直都是使用默认提供的一个地图。是不是stdr只能使用这个地图呢?那你就太小看stdr了,它加载地图的方式其实跟我们在amcl中要进行定位时的地图是一样的,都是需要类似像map_server这样的工具来加载地图。不过这里使用的是stdr_server。在stdr中其实提供了很多张做好地图,只不过默认打开的都是一张地图。如果要想修改为其他的地图也是很容易的,只要修改下launch文件中加载的地图名称即可。在这里说到如何加载地图了,其实很多小伙伴以前都询问过能否自己做地图来加载呢?我一直回答说是可以的,只不过没有跟大家详细介绍过如何操作,这里就顺便给大家介绍如何制作一个地图来加载测试。
0x01 加载默认提供的其他地图
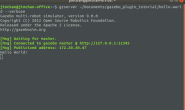
首先来看下stdr都将地图存储在哪个路径下,我们先将提供的其他地图给加载起来看看效果。下图是默认提供的地图文件:

由上图可以得知,在加载地图时,地图文件都是成对出现的。一个png图片文件,一个同名的yaml文件,这个yaml文件就是一个配置参数。在加载地图时会根据这些参数来显示地图的,可以看到每次当我们调用以下命令时,其实每次都是加载sparse_obstacles地图:
roslaunch stdr_launchers server_with_map_and_gui_plus_robot.launch

我们首先来看下这个server_with_map_and_gui_plus_robot.launch文件是如何编写的,我们可以参考该文件来加载其他地图,该launch文件代码如下:
<launch>

	<include file="$(find stdr_robot)/launch/robot_manager.launch" />

	<node type="stdr_server_node" pkg="stdr_server" name="stdr_server" output="screen" args="$(find stdr_resources)/maps/sparse_obstacles.yaml"/>

	<node pkg="tf" type="static_transform_publisher" name="world2map" args="0 0 0 0 0 0  world map 100" />

	<include file="$(find stdr_gui)/launch/stdr_gui.launch"/>

	<node pkg="stdr_robot" type="robot_handler" name="$(anon robot_spawn)" args="add $(find stdr_resources)/resources/robots/pandora_robot.yaml 1 2 0" />

</launch>
由上述代码我们可以得知,通过stdr_server_node节点来加载地图。在最后的args参数中可知,加载的地图是sparse_obstacles.yaml文件。我们只要修改该地图文件名,这样就可以加载其他地图了。最后启动的节点是用来在地图上放置机器人的位置的,我们可以看到这里加载的机器人是pandora_robot.yaml,其实我们可以修改该文件名就可以加载其他机器人了。最后的三个数字“1 2 0”,分别代表的意思是“放置的横坐标,纵坐标,机器人朝向”。对于这个朝向需要注意,它是使用弧度来表示的,这里0表示朝向正向右。如果想让机器人正向超上的话,意思就是逆时针转动90度,那么这里的弧度就是1.57了。如果想让机器人正朝向左边,那就是逆时针转动180度,这里的弧度就是3.14了。
下面我们就可以根据这个launch文件来修改一下加载其他地图了,下面分别写launch文件来加载其他地图:
-
加载frieburg地图
我们在stdr_launchers文件夹下的launch文件夹中,新增frieburg_map_robot_gui.launch启动文件,具体的代码如下:
<!--
  Author:corvin
  Description: Load gui with frieburg map and pandora robot.
  History:
    20181220: Initial this launch file.
-->
<launch>
  <include file="$(find stdr_robot)/launch/robot_manager.launch" />
  <node type="stdr_server_node" pkg="stdr_server" name="stdr_server" output="screen" args="$(find stdr_resources)/maps/frieburg.yaml"/>
  <node pkg="tf" type="static_transform_publisher" name="world2map" args="0 0 0 0 0 0  world map 100" />
  <include file="$(find stdr_gui)/launch/stdr_gui.launch"/>
  <node pkg="stdr_robot" type="robot_handler" name="$(anon robot_spawn)" args="add $(find stdr_resources)/resources/robots/pandora_robot.yaml 25 25 0" />
</launch>
当使用如下命令来启动该launch文件就可以看到新加载的地图了,命令如下:
roslaunch stdr_launchers frieburg_map_robot_gui.launch

-
加载hospital_section地图
同样在stdr_launchers下的launch文件夹中新增launch文件hospital_map_robot_gui.launch,该启动文件的代码如下:
<!--
  Author:corvin
  Description: Load gui with hospital map and pandora robot.
  History:
    20181220: Initial this launch file.
-->
<launch>
  <include file="$(find stdr_robot)/launch/robot_manager.launch" />
  <node type="stdr_server_node" pkg="stdr_server" name="stdr_server" output="screen" args="$(find stdr_resources)/maps/hospital_section.yaml"/>
  <node pkg="tf" type="static_transform_publisher" name="world2map" args="0 0 0 0 0 0  world map 100" />
  <include file="$(find stdr_gui)/launch/stdr_gui.launch"/>
  <node pkg="stdr_robot" type="robot_handler" name="$(anon robot_spawn)" args="add $(find stdr_resources)/resources/robots/pandora_robot.yaml 2 15 0" />
</launch>
使用如下命令来加载该启动文件,这样就可以看到新地图了,命令如下:
roslaunch stdr_launchers hospital_map_robot_gui.launch

-
加载mines地图
同理可得了,在stdr_launchs下的launch文件夹中新增mines_map_robot_gui.launch启动文件,该文件代码如下:
<!--
  Author:corvin
  Description: Load gui with mines map and pandora robot.
  History:
    20181220: Initial this launch file.
-->
<launch>
  <include file="$(find stdr_robot)/launch/robot_manager.launch" />
  <node type="stdr_server_node" pkg="stdr_server" name="stdr_server" output="screen" args="$(find stdr_resources)/maps/mines.yaml"/>
  <node pkg="tf" type="static_transform_publisher" name="world2map" args="0 0 0 0 0 0  world map 100" />
  <include file="$(find stdr_gui)/launch/stdr_gui.launch"/>
  <node pkg="stdr_robot" type="robot_handler" name="$(anon robot_spawn)" args="add $(find stdr_resources)/resources/robots/pandora_robot.yaml 28 17 0" />
</launch>
启动该launch文件的命令如下:
roslaunch stdr_launchers mines_map_robot_gui.launch

-
加载robocup地图
同理,新增robocup_map_robot_gui.launch文件,该文件的代码如下:
<!--
  Author:corvin
  Description: Load gui with robocup map and pandora robot.
  History:
    20181220: Initial this launch file.
-->
<launch>
  <include file="$(find stdr_robot)/launch/robot_manager.launch" />
  <node type="stdr_server_node" pkg="stdr_server" name="stdr_server" output="screen" args="$(find stdr_resources)/maps/robocup.yaml"/>
  <node pkg="tf" type="static_transform_publisher" name="world2map" args="0 0 0 0 0 0  world map 100" />
  <include file="$(find stdr_gui)/launch/stdr_gui.launch"/>
  <node pkg="stdr_robot" type="robot_handler" name="$(anon robot_spawn)" args="add $(find stdr_resources)/resources/robots/pandora_robot.yaml 6 10 1.57" />
</launch>
使用如下命令来启动该launch文件,这样就可以看到新地图了,命令
使用如下命令来启动该launch文件,这样就可以看到新地图了,命令如下:
roslaunch stdr_launchers robocup_map_robot_gui.launch

-
加载simple_rooms地图
在launch文件中新增rooms_map_robot_gui.launch,该文件的代码如下:
<!--
  Author:corvin
  Description: Load gui with simple rooms map and pandora robot.
  History:
    20181220: Initial this launch file.
-->
<launch>
  <include file="$(find stdr_robot)/launch/robot_manager.launch" />
  <node type="stdr_server_node" pkg="stdr_server" name="stdr_server" output="screen" args="$(find stdr_resources)/maps/simple_rooms.yaml"/>
  <node pkg="tf" type="static_transform_publisher" name="world2map" args="0 0 0 0 0 0  world map 100" />
  <include file="$(find stdr_gui)/launch/stdr_gui.launch"/>
  <node pkg="stdr_robot" type="robot_handler" name="$(anon robot_spawn)" args="add $(find stdr_resources)/resources/robots/pandora_robot.yaml 2 8 0" />
</launch>
可以使用如下命令来启动该launch文件:
roslaunch stdr_launchers rooms_map_robot_gui.launch

-
加载simple_rooms_no_walls地图
新增nowall_rooms_robot_gui.launch文件,该文件的代码如下:
<!--
  Author:corvin
  Description: Load gui with no wall rooms map and pandora robot.
  History:
    20181220: Initial this launch file.
-->
<launch>
  <include file="$(find stdr_robot)/launch/robot_manager.launch" />
  <node type="stdr_server_node" pkg="stdr_server" name="stdr_server" output="screen" args="$(find stdr_resources)/maps/simple_rooms_no_walls.yaml"/>
  <node pkg="tf" type="static_transform_publisher" name="world2map" args="0 0 0 0 0 0  world map 100" />
  <include file="$(find stdr_gui)/launch/stdr_gui.launch"/>
  <node pkg="stdr_robot" type="robot_handler" name="$(anon robot_spawn)" args="add $(find stdr_resources)/resources/robots/pandora_robot.yaml 2 8 0" />
</launch>
启动该launch文件的命令如下:
roslaunch stdr_launchers nowall_rooms_robot_gui.launch

0x03 加载自定义地图
自定义地图其实可以使用类似画图这样的软件来自己画一个的,就如同上面的那张图。这里为了介绍更加复杂点的自定义地图,我就从百度上找了一些家庭里两居室的户型图。这样的地图会更加实用点,大家可以去自己搜索或者直接用我下载的。这里是一张两居室和三居室的户型图,如下所示:


虽然这些图可以用,但是还是需要做些小修改的。因为在进行雷达建图时,会将黑色的部分当作障碍物。上面两张图都可以看出来,每个屋里的房门都给画出来了开门朝向和路径。还有就是这些提示的字也需要修改一下,不然也会把这些字当作障碍物来建地图的。在这里我只拿第一张两居室的图来做举例说明了,告诉大家如何修改。第二张图片留给大家来自行修改了,算是作为一个练习题了。
将第一张图在liunux下kolourPaint(类似与windows下的画图软件)打开,然后修改。修改步骤都是很简单的,其实大部分都是用橡皮擦把很多东西给删除了,或者用移动工具将字换下位置,或者使用直线来将一些线条加强一下。最终修改的图片如下:

可以看出来我并没有将所有的字都给删除,那是因为我将字给放到线框中。这样激光雷达在进行建图时,是扫描不到这些字的,所以不影响我们建图。接下来我们将这张图片放到如下图所示的路径中:

在前面也介绍过,在加载地图时,除了这个png文件,还需要有一个同名的yaml文件。该yaml文件就是加载地图时的一些参数,每个yaml文件的参数差不多,我是复制其他的然后修改一下。该yaml文件的代码如下:
image: home.png
resolution: 0.05
origin: [0.0, 0.0, 0.0]
occupied_thresh: 0.2
free_thresh: 0.1
negate: 0
下面来依次介绍下yaml文件中的各参数意义:
- image:包含占用数据的图像文件的路径; 可以是绝对的,也可以是相对于YAML文件的位置.
- resolution:地图的分辨率,米/像素.
- origin:地图中左下角像素的二维姿态(x,y,yaw),偏航为逆时针旋转(偏航= 0表示无旋转),系统的许多部分目前忽略了偏航.
- occupied_thresh:大于此阈值的像素被视为完全占用,如果你的地图上线条不是特别黑的话,建议将该值降低.
- free_thresh:小于此阈值的像素被认为是完全空闲的,如果线条黑的颜色值低于该值则认为是空白的,不是障碍物.
- negate:是否应该反转白/黑,空闲/占用(阈值的解释不受影响).
下面来介绍对应的launch文件的编写,这里命名为home_map_robot_gui.launch,将其也放在stdr_launchers下的launch文件夹中,代码如下:
<!--
  Author:corvin
  Description: Load gui with home rooms map and pandora robot.
  History:
    20181220: Initial this launch file.
-->
<launch>
  <include file="$(find stdr_robot)/launch/robot_manager.launch" />
  <node type="stdr_server_node" pkg="stdr_server" name="stdr_server" output="screen" args="$(find stdr_resources)/maps/home.yaml"/>
  <node pkg="tf" type="static_transform_publisher" name="world2map" args="0 0 0 0 0 0  world map 100" />
  <include file="$(find stdr_gui)/launch/stdr_gui.launch"/>
  <node pkg="stdr_robot" type="robot_handler" name="$(anon robot_spawn)" args="add $(find stdr_resources)/resources/robots/pandora_robot.yaml 17 33 4.71" />
</launch>
然后可以使用下面的命令来加载该launch文件,这样就可以看到DIY的地图加载起来的样子了,命令如下:
roslaunch stdr_launchers home_map_robot_gui.launch

同样,我们也可以基于该地图来进行gmapping建图,下面动图就是建图的过程,供大家参考:

0x04 References
[1]. ros wiki. Running STDR Simulator.
http://wiki.ros.org/stdr_simulator/Tutorials/Running%20STDR%20Simulator
[2]. ros wiki. How to load a map.
http://wiki.ros.org/stdr_simulator/Tutorials/How%20to%20load%20a%20map
[3]. ros wiki. map_server的介绍. http://wiki.ros.org/map_server
[4]. 天涯0508. ROS开发笔记(6)—利用 gmapping 构建环境地图(map).
https://blog.csdn.net/wsc820508/article/details/81556620
0x05 Feedback
大家在按照教程操作过程中有任何问题,可以直接在文章末尾给我留言,或者关注ROS小课堂的官方微信公众号,在公众号中给我发消息反馈问题也行。我基本上每天都会处理公众号中的留言!当然如果你要是顺便给ROS小课堂打个赏,我也会感激不尽的,打赏30块还会被邀请进ROS小课堂的微信群,与更多志同道合的小伙伴一起学习和交流!