新建环境模型
- 1 控制器结构
- 2 操作函数
- 2.1 初始化函数
- 2.2 距离传感器操作函数
- 2.3 ground_sensors 操作函数
- 2.4 激光雷达传感器操作函数
- 2.5 LED灯作函数
- 2.7 电机操作函数
- 3 DEMO
- 参考资料
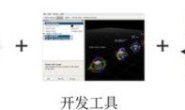
这里我们分析webots中的基础控制器,这是由于这其中涉及到很多的基础控制函数(比如读取传感器数据、控制电机),通过了解这些基础控制器中的操作函数,为我们后面介绍ROS控制做基础。这里以webots自带的机器人 e-puck 的控制器为例,介绍webots控制器的编写规范。 首先我们打开 e-puck_line.wbt 模型文件,选择自带的避障控制器,如下图:

1 控制器结构
webots的控制器和C语言的语法非常相似,入口地址为函数main()函数,webots访问机器人上的每一个传感器(距离传感器)和执行器(电机)都是依靠操作句柄实现的,操作句柄可以被理解为一个结构体,每一个传感器都对应一个操作句柄,在创建这个操作句柄的时候需要输入这个传感器的名称。
/* include headers */
#include <stdio.h>
#include <stdlib.h>
#include <string.h>

#include <webots/device.h>
#include <webots/distance_sensor.h>
#include <webots/led.h>
#include <webots/motor.h>
#include <webots/nodes.h>
#include <webots/robot.h>

/* Device stuff */
#define DISTANCE_SENSORS_NUMBER 8
static WbDeviceTag distance_sensors[DISTANCE_SENSORS_NUMBER];
static double distance_sensors_values[DISTANCE_SENSORS_NUMBER];
static const char *distance_sensors_names[DISTANCE_SENSORS_NUMBER] = {"ps0", "ps1", "ps2", "ps3", "ps4", "ps5", "ps6", "ps7"};

#define GROUND_SENSORS_NUMBER 3
static WbDeviceTag ground_sensors[GROUND_SENSORS_NUMBER];
static double ground_sensors_values[GROUND_SENSORS_NUMBER] = {0.0, 0.0, 0.0};
static const char *ground_sensors_names[GROUND_SENSORS_NUMBER] = {"gs0", "gs1", "gs2"};

#define LEDS_NUMBER 10
static WbDeviceTag leds[LEDS_NUMBER];
static bool leds_values[LEDS_NUMBER];
static const char *leds_names[LEDS_NUMBER] = {"led0", "led1", "led2", "led3", "led4", "led5", "led6", "led7", "led8", "led9"};

static WbDeviceTag left_motor, right_motor;

#define LEFT 0
#define RIGHT 1
#define MAX_SPEED 6.28
static double speeds[2];

/* Breitenberg stuff */
static double weights[DISTANCE_SENSORS_NUMBER][2] = {{-1.3, -1.0}, {-1.3, -1.0}, {-0.5, 0.5}, {0.0, 0.0},
                                                     {0.0, 0.0},   {0.05, -0.5}, {-0.75, 0},  {-0.75, 0}};
static double offsets[2] = {0.5 * MAX_SPEED, 0.5 * MAX_SPEED};

static int get_time_step() {
  static int time_step = -1;
  if (time_step == -1)
    time_step = (int)wb_robot_get_basic_time_step();
  return time_step;
}

static void step() {
  if (wb_robot_step(get_time_step()) == -1) {
    wb_robot_cleanup();
    exit(EXIT_SUCCESS);
  }
}

static void passive_wait(double sec) {
  double start_time = wb_robot_get_time();
  do {
    step();
  } while (start_time + sec > wb_robot_get_time());
}

static void init_devices() {
  int i;
  for (i = 0; i < DISTANCE_SENSORS_NUMBER; i++) {
    distance_sensors[i] = wb_robot_get_device(distance_sensors_names[i]);
    wb_distance_sensor_enable(distance_sensors[i], get_time_step());
  }
  for (i = 0; i < LEDS_NUMBER; i++)
    leds[i] = wb_robot_get_device(leds_names[i]);

  // silently initialize the ground sensors if they exists
  for (i = 0; i < GROUND_SENSORS_NUMBER; i++)
    ground_sensors[i] = (WbDeviceTag)0;
  int ndevices = wb_robot_get_number_of_devices();
  for (i = 0; i < ndevices; i++) {
    WbDeviceTag dtag = wb_robot_get_device_by_index(i);
    const char *dname = wb_device_get_name(dtag);
    WbNodeType dtype = wb_device_get_node_type(dtag);
    if (dtype == WB_NODE_DISTANCE_SENSOR && strlen(dname) == 3 && dname[0] == 'g' && dname[1] == 's') {
      int id = dname[2] - '0';
      if (id >= 0 && id < GROUND_SENSORS_NUMBER) {
        ground_sensors[id] = wb_robot_get_device(ground_sensors_names[id]);
        wb_distance_sensor_enable(ground_sensors[id], get_time_step());
      }
    }
  }

  // get a handler to the motors and set target position to infinity (speed control).
  left_motor = wb_robot_get_device("left wheel motor");
  right_motor = wb_robot_get_device("right wheel motor");
  wb_motor_set_position(left_motor, INFINITY);
  wb_motor_set_position(right_motor, INFINITY);
  wb_motor_set_velocity(left_motor, 0.0);
  wb_motor_set_velocity(right_motor, 0.0);

  step();
}

static void reset_actuator_values() {
  int i;
  for (i = 0; i < 2; i++)
    speeds[i] = 0.0;
  for (i = 0; i < LEDS_NUMBER; i++)
    leds_values[i] = false;
}

static void get_sensor_input() {
  int i;
  for (i = 0; i < DISTANCE_SENSORS_NUMBER; i++) {
    distance_sensors_values[i] = wb_distance_sensor_get_value(distance_sensors[i]);

    // scale the data in order to have a value between 0.0 and 1.0
    // 1.0 representing something to avoid, 0.0 representing nothing to avoid
    distance_sensors_values[i] /= 4096;
  }

  for (i = 0; i < GROUND_SENSORS_NUMBER; i++) {
    if (ground_sensors[i])
      ground_sensors_values[i] = wb_distance_sensor_get_value(ground_sensors[i]);
  }
}

static bool cliff_detected() {
  int i;
  for (i = 0; i < GROUND_SENSORS_NUMBER; i++) {
    if (!ground_sensors[i])
      return false;
    if (ground_sensors_values[i] < 500.0)
      return true;
  }
  return false;
}

static void set_actuators() {
  int i;
  for (i = 0; i < LEDS_NUMBER; i++)
    wb_led_set(leds[i], leds_values[i]);
  wb_motor_set_velocity(left_motor, speeds[LEFT]);
  wb_motor_set_velocity(right_motor, speeds[RIGHT]);
}

static void blink_leds() {
  static int counter = 0;
  counter++;
  leds_values[(counter / 10) % LEDS_NUMBER] = true;
}

static void run_braitenberg() {
  int i, j;
  for (i = 0; i < 2; i++) {
    speeds[i] = 0.0;
    for (j = 0; j < DISTANCE_SENSORS_NUMBER; j++)
      speeds[i] += distance_sensors_values[j] * weights[j][i];

    speeds[i] = offsets[i] + speeds[i] * MAX_SPEED;
    if (speeds[i] > MAX_SPEED)
      speeds[i] = MAX_SPEED;
    else if (speeds[i] < -MAX_SPEED)
      speeds[i] = -MAX_SPEED;
  }
}

static void go_backwards() {
  wb_motor_set_velocity(left_motor, -MAX_SPEED);
  wb_motor_set_velocity(right_motor, -MAX_SPEED);
  passive_wait(0.2);
}

static void turn_left() {
  wb_motor_set_velocity(left_motor, -MAX_SPEED);
  wb_motor_set_velocity(right_motor, MAX_SPEED);
  passive_wait(0.2);
}

int main(int argc, char **argv) {
  wb_robot_init();

  printf("Default controller of the e-puck robot started...\n");

  init_devices();

  while (true) {
    reset_actuator_values();
    get_sensor_input();
    blink_leds();
    if (cliff_detected())
	{
      go_backwards();
      turn_left();
    }
	else
	{
      run_braitenberg();
    }
    set_actuators();
    step();
  };

  return EXIT_SUCCESS;
}
2 操作函数
首先我们来看看上面文件中的主要操作函数
2.1 初始化函数
webots的初始化函数为
1 wb_robot_init();
2.2 距离传感器操作函数
 1、e-puck有着8个距离传感器名字分别为(“ps0”, “ps1”, “ps2”, “ps3”, “ps4”, “ps5”, “ps6”, “ps7”)
1   #define DISTANCE_SENSORS_NUMBER 8
2   static WbDeviceTag distance_sensors[DISTANCE_SENSORS_NUMBER]; // 申明数组
3   static double distance_sensors_values[DISTANCE_SENSORS_NUMBER];
4   static const char *distance_sensors_names[DISTANCE_SENSORS_NUMBER] = {"ps0",   "ps1", "ps2", "ps3", "ps4", "ps5", "ps6", "ps7"};
2、构建操作句柄,使能传感器
1   int i;
2    for (i = 0; i < DISTANCE_SENSORS_NUMBER; i++) {
3      distance_sensors[i] = wb_robot_get_device(distance_sensors_names[i]);
4      wb_distance_sensor_enable(distance_sensors[i], get_time_step());
 5      }
3、读取传感器的数据
  int i;
 for (i = 0; i < DISTANCE_SENSORS_NUMBER; i++) {
    distance_sensors_values[i] = wb_distance_sensor_get_value(distance_sensors[i]);

    // scale the data in order to have a value between 0.0 and 1.0
    // 1.0 representing something to avoid, 0.0 representing nothing to avoid
    distance_sensors_values[i] /= 4096;
  }
2.3 ground_sensors 操作函数
1、初始化变量
#define GROUND_SENSORS_NUMBER 3
static WbDeviceTag ground_sensors[GROUND_SENSORS_NUMBER];
static double ground_sensors_values[GROUND_SENSORS_NUMBER] = {0.0, 0.0, 0.0};
static const char *ground_sensors_names[GROUND_SENSORS_NUMBER] = {"gs0", "gs1", "gs2"};
2、构建操作句柄,使能传感器
 ground_sensors[id] = wb_robot_get_device(ground_sensors_names[id]);
 wb_distance_sensor_enable(ground_sensors[id], get_time_step());
3、读取传感器的数据
for (i = 0; i < GROUND_SENSORS_NUMBER; i++) {
    if (ground_sensors[i])
      ground_sensors_values[i] = wb_distance_sensor_get_value(ground_sensors[i]);
  }
2.4 激光雷达传感器操作函数
2.5 LED灯作函数
1、声明变量
#define LEDS_NUMBER 10
static WbDeviceTag leds[LEDS_NUMBER];
static bool leds_values[LEDS_NUMBER];
static const char *leds_names[LEDS_NUMBER] = {"led0", "led1", "led2", "led3", "led4", "led5", "led6", "led7", "led8", "led9"};
2、构建操作句柄
  for (i = 0; i < LEDS_NUMBER; i++)
    leds[i] = wb_robot_get_device(leds_names[i]);
3、设置LED的值
  for (i = 0; i < LEDS_NUMBER; i++)
    wb_led_set(leds[i], leds_values[i]);
2.7 电机操作函数
1、获取电机操作句柄。”left wheel motor”表示电机的名称
  left_motor = wb_robot_get_device("left wheel motor");
  right_motor = wb_robot_get_device("right wheel motor");
2、设置电机行进的位移
  wb_motor_set_position(left_motor, INFINITY);
  wb_motor_set_position(right_motor, INFINITY);
3、设置电机速度
  wb_motor_set_velocity(left_motor, 0.0);
  wb_motor_set_velocity(right_motor, 0.0);
从上面的形式来看,每一个传感器操作都会经历声明变量、构建操作句柄、获取传感器值三个操作,其中获取操作句柄都是使用的 wb_robot_get_device() 这个函数实现的。
3 DEMO
下面是我在【2】上修改到的一个控制,读取距离传感器的值实现小车避障,同时小车身上的灯会循环点亮。
 以下是c文件的控制器代码
#include <webots/robot.h>
#include <webots/distance_sensor.h>
#include <webots/motor.h>
#include <webots/led.h>
// time in [ms] of a simulation step
#define TIME_STEP 64

#define MAX_SPEED 6.28

/* Device stuff */
#define DISTANCE_SENSORS_NUMBER 8
static WbDeviceTag distance_sensors[DISTANCE_SENSORS_NUMBER];
static double distance_sensors_values[DISTANCE_SENSORS_NUMBER];
static const char *distance_sensors_names[DISTANCE_SENSORS_NUMBER] = {"ps0", "ps1", "ps2", "ps3", "ps4", "ps5", "ps6", "ps7"};

#define LEDS_NUMBER 10
static WbDeviceTag leds[LEDS_NUMBER];
static bool leds_values[LEDS_NUMBER];
static const char *leds_names[LEDS_NUMBER] = {"led0", "led1", "led2", "led3", "led4", "led5", "led6", "led7", "led8", "led9"};


static int counter = 0;
// entry point of the controller
int main(int argc, char **argv) {
  // initialize the Webots API
  wb_robot_init();

  // internal variables
  int i;
  for (i = 0; i < DISTANCE_SENSORS_NUMBER; i++) {
    distance_sensors[i] = wb_robot_get_device(distance_sensors_names[i]);
    wb_distance_sensor_enable(distance_sensors[i], TIME_STEP);
  }


    for (i = 0; i < LEDS_NUMBER; i++)
    leds[i] = wb_robot_get_device(leds_names[i]);

  WbDeviceTag left_motor = wb_robot_get_device("left wheel motor");
  WbDeviceTag right_motor = wb_robot_get_device("right wheel motor");
  wb_motor_set_position(left_motor, INFINITY);
  wb_motor_set_position(right_motor, INFINITY);
  wb_motor_set_velocity(left_motor, 0.0);
  wb_motor_set_velocity(right_motor, 0.0);

  // feedback loop: step simulation until an exit event is received
  while (wb_robot_step(TIME_STEP) != -1) {
    // read sensors outputs

    for (i = 0; i < DISTANCE_SENSORS_NUMBER ; i++)
      distance_sensors_values[i] = wb_distance_sensor_get_value(distance_sensors[i]);

    // detect obstacles
    bool right_obstacle =
      distance_sensors_values[0] > 80.0 ||
      distance_sensors_values[1] > 80.0 ||
      distance_sensors_values[2] > 80.0;
    bool left_obstacle =
      distance_sensors_values[5] > 80.0 ||
      distance_sensors_values[6] > 80.0 ||
      distance_sensors_values[7] > 80.0;

    // initialize motor speeds at 50% of MAX_SPEED.
    double left_speed  = 0.5 * MAX_SPEED;
    double right_speed = 0.5 * MAX_SPEED;

    // modify speeds according to obstacles
    if (left_obstacle) {
      // turn right
      left_speed  += 0.5 * MAX_SPEED;
      right_speed -= 0.5 * MAX_SPEED;
    }
    else if (right_obstacle) {
      // turn left
      left_speed  -= 0.5 * MAX_SPEED;
      right_speed += 0.5 * MAX_SPEED;
    }


  for (i = 0; i < LEDS_NUMBER; i++)
    leds_values[i] = false;
  counter++;
  leds_values[(counter / 10) % LEDS_NUMBER] = true;

  for (i = 0; i < LEDS_NUMBER; i++)
    wb_led_set(leds[i], leds_values[i]);

    // write actuators inputs
    wb_motor_set_velocity(left_motor, left_speed);
    wb_motor_set_velocity(right_motor, right_speed);
  }

  // cleanup the Webots API
  wb_robot_cleanup();
  return 0; //EXIT_SUCCESS
}
参考资料
[1] https://www.cyberbotics.com/doc/reference/motion [2] https://cyberbotics.com/doc/guide/tutorial-4-more-about-controllers?tab-language=c 如果大家觉得文章对你有所帮助,麻烦大家帮忙点个赞。O(∩_∩)O


