视觉SLAM学习【5】—–ubuntu16.04上基于KDevelop的VO框架搭建及特征提取与匹配目录
- 一、VO框架简介
-
- 1、什么是VO框架?
- 2、VO框架的组成结构
- 3、VO框架的项目构成
- 4、VO框架的项目在KDevelop中的目录
- 5、项目资源获取
- 二、Sophus工具的安装
-
- 1、Sophus工具的下载
- 2、Sophus工具的编译
- 三、基于KDevelop的VO框架搭建
-
- 1、创建VO项目
- 2、创建bin文件夹
- 3、将g2o中的cmake_modules文件夹移动到该项目中
- 4、新建config文件夹
- 5、新建include/myslam文件夹
- 5、新建lib文件夹
- 6、新建src文件夹
- 7、新建test文件夹
- 8、编写VO项目的==CMakeLists.txt==文件
- 四、项目编译的两种方法
-
- 1、KDevelo客户端编译
- 2、终端编译
- 3、进入TUM数据集,生成配对文件 associate.txt
- 五、Kdevelop配置运行环境,并运行结果
-
- 1、配置运行的可执行文件
- 2、运行
视觉里程计VO的搭建基本都会有以下几个问题:怎么管理地图点,如何处理误匹配,如何选择关键帧等等,由简到繁进行。本次博客,林君学长将带大家了解,在进行嵌入式开发的时候,我们自己如何来搭建一个VO框架,以及实现TUM数据集(本次博客只会用到TUM中一部分)的特征提取及匹配,接下来,就让我们一起阅读VO的基本框架搭建吧! 该项目系统及软件版本:
- ubuntu版本:ubuntuKylin-16.04
- Kdevelop版本:Kdevelop-5.5.1
在开始搭建VO框架时,我们首先得了解什么是VO
一、VO框架简介
1、什么是VO框架?
VO框架就是通过相机、地图、帧、路标来模拟搭建一个类似于现实生活中的虚拟场景,这类技术主要的体现是很多小伙伴喜欢玩耍的游戏《我的世界》里面,通过虚拟搭建现实
2、VO框架的组成结构
1)、VO框架的组成结构如下图所示:
 2)、我们可以看到,其结构组成主要包括5个部分,分别解释如下:
- Frame 为帧
- Camera 为相机模型
- MapPoint 为特征点/路标点
- Map管理特征点
- Config 提供配置参数
3、VO框架的项目构成
1)、VO项目的整体构成如下图所示:
 2)、其中项目构成板块说明如下:(序号与上图圈号对应)
- 1、bin 用来存放可执行的二进制(及编译产生的可执行文件)
- 2、build 为kdevelop编译说产生的文件夹,里面存放编译产生的文件
- 3、cmake_modules 存放第三方库的 cmake 文件,在使用 g2o 之类的库中会用到它
- 4、config 存放配置文件
- 5、include/myslam 存放 slam 模块的头文件,主要是.h。这种做法的理由是,当你把包含目录设到 include 时,在引用自己的头文件时,需要写 include ”myslam/xxx.h”,这样不容易和别的库混淆
- 6、lib 存放编译好的库文件
- 7、src 存放源代码文件,主要是 cpp
- 8、test 存放测试用的文件,也是 cpp
- 9、CMakeLists.txt用于配置cpp程序的配置文件,需要我们自己编写
4、VO框架的项目在KDevelop中的目录


5、项目资源获取
1)、本次博客的有所项目临近学长都已经上传至CSDN我的资源模块,小伙伴们可以通过如下链接下载获取,链接如下: https://download.csdn.net/download/qq_42451251/12421287 2)、该资源总共包含两个文件夹,一个是VO项目,一个是特征提取将会用到的TUM部分数据集,林君学长从整体数据集中截取的一部分,大约是30张图片,用于验证VO的特征提取及匹配,如果有完整TUM数据集的小伙伴可以忽略该数据集,一下的博客,主要用的数据集就是该TUM部分数据集
 接下来,林君学长将带大家进行kdevelop的VO框架搭建,从无到有,从零到整,首先,需要安装Sophus工具,具体操作如下所示:
二、Sophus工具的安装
1、Sophus工具的下载
1)、打开终端,下载Sophus工具
git clone https://github.com/strasdat/Sophus.git
 2)、进入Sophus文件,进行git checkout——检出
cd Sophus
git checkout a621ff
2、Sophus工具的编译
1)、创建build文件夹,进行编译
mkdir build
cd build
cmake ..
make -j8
sudo make install
接下来,就进行KDevelop的VO框架搭建吧!
三、基于KDevelop的VO框架搭建
1、创建VO项目
1)、KDevelop的项目创建请参考林君学长的另一篇博客,链接如下: https://blog.csdn.net/qq_42451251/article/details/106101789 2)、创建完成如下所示:
 3)、删除项目中的所有文件夹及文件夹只保留外部CMakeLists.txt文件,如下所示,不需要项目自动创建的东西,我们自己创建,同时,清空CMakeLists.txt的文件内容

2、创建bin文件夹
1)、点击项目创建bin
 2)、输入名称
 3)、这时候项目中有一个模块了:
![]()
3、将g2o中的cmake_modules文件夹移动到该项目中
1)、没有安装g2o的小伙伴参考林君学长博客进行安装,博客链接: https://blog.csdn.net/qq_42451251/article/details/106092598
 2)、复制g2o中的cmake_modules文件夹、粘贴到vo项目中去

 3)、这时候,vo项目中已经有2个模块了:

4、新建config文件夹
1)、congif文件夹的创建,这时候,vo项目中有3个模块了:
 2)、在config文件夹下新建default.yaml文件

 3)、default.yaml文件内容如下所示:
%YAML:1.0
# data
# the tum dataset directory, change it to yours!
dataset_dir:/home/xxx/lenovo/ros/src/ORB_SLAM2/Data/TUM
# camera intrinsics
# fr1
camera.fx: 517.3
camera.fy: 516.5
camera.cx: 325.1
camera.cy: 249.7

camera.depth_scale: 5000

# VO paras
number_of_features: 500
scale_factor: 1.2
level_pyramid: 8
match_ratio: 2.0
max_num_lost: 10
min_inliers: 10
keyframe_rotation: 0.1
keyframe_translation: 0.1
其中dataset_dir:/home/xxx/lenovo/ros/src/ORB_SLAM2/Data/TUM为TUM数据集的位置,小伙伴们根据自己路径修改
5、新建include/myslam文件夹
1)、在vo中新建include/myslam文件夹,这时候,vo项目中有4个模块了:

![]() 2)、在myslam文件夹下创建common_include.h类,文件中代码如下所示:
2)、在myslam文件夹下创建common_include.h类,文件中代码如下所示:
#ifndef COMMON_INCLUDE_H
#define COMMON_INCLUDE_H

// define the commonly included file to avoid a long include list
// for Eigen
#include <Eigen/Core>
#include <Eigen/Geometry>
using Eigen::Vector2d;
using Eigen::Vector3d;

// for Sophus
#include <sophus/se3.h>
#include <sophus/so3.h>
using Sophus::SE3;
using Sophus::SO3;

// for cv
#include <opencv2/core/core.hpp>
using cv::Mat;

// std
#include <vector>
#include <list>
#include <memory>
#include <string>
#include <iostream>
#include <set>
#include <unordered_map>
#include <map>

using namespace std;
#endif
3)、在include文件夹下创建camera.h类,文件中代码如下所示:
#ifndef CAMERA_H
#define CAMERA_H

#include "myslam/common_include.h"

namespace myslam
{

// Pinhole RGBD camera model
class Camera
{
public:
    typedef std::shared_ptr<Camera> Ptr;
    float   fx_, fy_, cx_, cy_, depth_scale_;  // Camera intrinsics

    Camera();
    Camera ( float fx, float fy, float cx, float cy, float depth_scale=0 ) :
        fx_ ( fx ), fy_ ( fy ), cx_ ( cx ), cy_ ( cy ), depth_scale_ ( depth_scale )
    {}

    // coordinate transform: world, camera, pixel
    Vector3d world2camera( const Vector3d& p_w, const SE3& T_c_w );
    Vector3d camera2world( const Vector3d& p_c, const SE3& T_c_w );
    Vector2d camera2pixel( const Vector3d& p_c );
    Vector3d pixel2camera( const Vector2d& p_p, double depth=1 );
    Vector3d pixel2world ( const Vector2d& p_p, const SE3& T_c_w, double depth=1 );
    Vector2d world2pixel ( const Vector3d& p_w, const SE3& T_c_w );

};

}
#endif // CAMERA_H
4)、在include文件夹下创建config类,文件中代码如下所示:
#ifndef CONFIG_H
#define CONFIG_H

#include "myslam/common_include.h"

namespace myslam
{
class Config
{
private:
    static std::shared_ptr<Config> config_;
    cv::FileStorage file_;

    Config () {} // private constructor makes a singleton
public:
    ~Config();  // close the file when deconstructing

    // set a new config file
    static void setParameterFile( const std::string& filename );

    // access the parameter values
    template< typename T >
    static T get( const std::string& key )
    {
        return T( Config::config_->file_[key] );
    }
};
}

#endif // CONFIG_H
5)、在include文件夹下创建frame.h类,文件中代码如下所示:
#ifndef FRAME_H
#define FRAME_H

#include "myslam/common_include.h"
#include "myslam/camera.h"

namespace myslam
{

// forward declare
class MapPoint;
class Frame
{
public:
    typedef std::shared_ptr<Frame> Ptr;
    unsigned long                  id_;         // id of this frame
    double                         time_stamp_; // when it is recorded
    SE3                            T_c_w_;      // transform from world to camera
    Camera::Ptr                    camera_;     // Pinhole RGBD Camera model
    Mat                            color_, depth_; // color and depth image

public: // data members
    Frame();
    Frame( long id, double time_stamp=0, SE3 T_c_w=SE3(), Camera::Ptr camera=nullptr, Mat color=Mat(), Mat depth=Mat() );
    ~Frame();

    // factory function
    static Frame::Ptr createFrame();

    // find the depth in depth map
    double findDepth( const cv::KeyPoint& kp );

    // Get Camera Center
    Vector3d getCamCenter() const;

    // check if a point is in this frame
    bool isInFrame( const Vector3d& pt_world );
};

}

#endif // FRAME_H
6)、在include文件夹下创建mapPoint.h类,文件中代码如下所示:
#ifndef MAPPOINT_H
#define MAPPOINT_H

namespace myslam
{

class Frame;
class MapPoint
{
public:
    typedef shared_ptr<MapPoint> Ptr;
    unsigned long      id_; // ID
    Vector3d    pos_;       // Position in world
    Vector3d    norm_;      // Normal of viewing direction
    Mat         descriptor_; // Descriptor for matching
    int         observed_times_;    // being observed by feature matching algo.
    int         matched_times_;     // being an inliner in pose estimation

    MapPoint();
    MapPoint( long id, Vector3d position, Vector3d norm );

    // factory function
    static MapPoint::Ptr createMapPoint();
};
}

#endif // MAPPOINT_H
7)、在include文件夹下创建map.h类,文件中代码如下所示:
#ifndef MAP_H
#define MAP_H

#include "myslam/common_include.h"
#include "myslam/frame.h"
#include "myslam/mapPoint.h"

namespace myslam
{
class Map
{
public:
    typedef shared_ptr<Map> Ptr;
    unordered_map<unsigned long, MapPoint::Ptr >  map_points_;        // all landmarks
    unordered_map<unsigned long, Frame::Ptr >     keyframes_;         // all key-frames

    Map() {}

    void insertKeyFrame( Frame::Ptr frame );
    void insertMapPoint( MapPoint::Ptr map_point );
};
}

#endif // MAP_H
8)、在include文件夹下创建visual_odometry.h类,文件中代码如下所示:
#ifndef VISUALODOMETRY_H
#define VISUALODOMETRY_H

#include "myslam/common_include.h"
#include "myslam/map.h"

#include <opencv2/features2d/features2d.hpp>

namespace myslam
{
class VisualOdometry
{
public:
    typedef shared_ptr<VisualOdometry> Ptr;
    enum VOState {
        INITIALIZING=-1,
        OK=0,
        LOST
    };

    VOState     state_;     // current VO status
    Map::Ptr    map_;       // map with all frames and map points
    Frame::Ptr  ref_;       // reference frame
    Frame::Ptr  curr_;      // current frame

    cv::Ptr<cv::ORB> orb_;  // orb detector and computer
    vector<cv::Point3f>     pts_3d_ref_;        // 3d points in reference frame
    vector<cv::KeyPoint>    keypoints_curr_;    // keypoints in current frame
    Mat                     descriptors_curr_;  // descriptor in current frame
    Mat                     descriptors_ref_;   // descriptor in reference frame
    vector<cv::DMatch>      feature_matches_;

    SE3 T_c_r_estimated_;  // the estimated pose of current frame
    int num_inliers_;        // number of inlier features in icp
    int num_lost_;           // number of lost times

    // parameters
    int num_of_features_;   // number of features
    double scale_factor_;   // scale in image pyramid
    int level_pyramid_;     // number of pyramid levels
    float match_ratio_;      // ratio for selecting  good matches
    int max_num_lost_;      // max number of continuous lost times
    int min_inliers_;       // minimum inliers

    double key_frame_min_rot;   // minimal rotation of two key-frames
    double key_frame_min_trans; // minimal translation of two key-frames

public: // functions
    VisualOdometry();
    ~VisualOdometry();

    bool addFrame( Frame::Ptr frame );      // add a new frame

protected:
    // inner operation
    void extractKeyPoints();
    void computeDescriptors();
    void featureMatching();
    void poseEstimationPnP();
    void setRef3DPoints();

    void addKeyFrame();
    bool checkEstimatedPose();
    bool checkKeyFrame();

};
}

#endif // VISUALODOMETRY_H
9)、include/myslam下面的头文件整体如下:

5、新建lib文件夹
1)、lib文件夹的创建,这时候,vo项目中有5个模块了:

6、新建src文件夹
1)、src文件夹的创建,这时候,vo项目中有6个模块了:
 2)、在src文件夹下创建camera.cpp文件,文件内容如下所示:
#include "myslam/camera.h"
#include "myslam/config.h"

namespace myslam
{

Camera::Camera()
{
    fx_ = Config::get<float>("camera.fx");
    fy_ = Config::get<float>("camera.fy");
    cx_ = Config::get<float>("camera.cx");
    cy_ = Config::get<float>("camera.cy");
    depth_scale_ = Config::get<float>("camera.depth_scale");
}

Vector3d Camera::world2camera ( const Vector3d& p_w, const SE3& T_c_w )
{
    return T_c_w*p_w;
}

Vector3d Camera::camera2world ( const Vector3d& p_c, const SE3& T_c_w )
{
    return T_c_w.inverse() *p_c;
}

Vector2d Camera::camera2pixel ( const Vector3d& p_c )
{
    return Vector2d (
        fx_ * p_c ( 0,0 ) / p_c ( 2,0 ) + cx_,
        fy_ * p_c ( 1,0 ) / p_c ( 2,0 ) + cy_
    );
}

Vector3d Camera::pixel2camera ( const Vector2d& p_p, double depth )
{
    return Vector3d (
        ( p_p ( 0,0 )-cx_ ) *depth/fx_,
        ( p_p ( 1,0 )-cy_ ) *depth/fy_,
        depth
    );
}

Vector2d Camera::world2pixel ( const Vector3d& p_w, const SE3& T_c_w )
{
    return camera2pixel ( world2camera ( p_w, T_c_w ) );
}

Vector3d Camera::pixel2world ( const Vector2d& p_p, const SE3& T_c_w, double depth )
{
    return camera2world ( pixel2camera ( p_p, depth ), T_c_w );
}


}
3)、在src文件夹下创建frame.cpp文件,文件内容如下所示:
#include "myslam/frame.h"

namespace myslam
{
Frame::Frame()
: id_(-1), time_stamp_(-1), camera_(nullptr)
{

}

Frame::Frame ( long id, double time_stamp, SE3 T_c_w, Camera::Ptr camera, Mat color, Mat depth )
: id_(id), time_stamp_(time_stamp), T_c_w_(T_c_w), camera_(camera), color_(color), depth_(depth)
{

}

Frame::~Frame()
{

}

Frame::Ptr Frame::createFrame()
{
    static long factory_id = 0;
    return Frame::Ptr( new Frame(factory_id++) );
}

double Frame::findDepth ( const cv::KeyPoint& kp )
{
    int x = cvRound(kp.pt.x);
    int y = cvRound(kp.pt.y);
    ushort d = depth_.ptr<ushort>(y)[x];
    if ( d!=0 )
    {
        return double(d)/camera_->depth_scale_;
    }
    else
    {
        // check the nearby points
        int dx[4] = {-1,0,1,0};
        int dy[4] = {0,-1,0,1};
        for ( int i=0; i<4; i++ )
        {
            d = depth_.ptr<ushort>( y+dy[i] )[x+dx[i]];
            if ( d!=0 )
            {
                return double(d)/camera_->depth_scale_;
            }
        }
    }
    return -1.0;
}


Vector3d Frame::getCamCenter() const
{
    return T_c_w_.inverse().translation();
}

bool Frame::isInFrame ( const Vector3d& pt_world )
{
    Vector3d p_cam = camera_->world2camera( pt_world, T_c_w_ );
    if ( p_cam(2,0)<0 )
        return false;
    Vector2d pixel = camera_->world2pixel( pt_world, T_c_w_ );
    return pixel(0,0)>0 && pixel(1,0)>0
        && pixel(0,0)<color_.cols
        && pixel(1,0)<color_.rows;
}

}
4)、在src文件夹下创建config.cpp文件,文件内容如下所示:
#include "myslam/config.h"

namespace myslam
{

void Config::setParameterFile( const std::string& filename )
{
    if ( config_ == nullptr )
        config_ = shared_ptr<Config>(new Config);
    config_->file_ = cv::FileStorage( filename.c_str(), cv::FileStorage::READ );
    if ( config_->file_.isOpened() == false )
    {
        std::cerr<<"parameter file "<<filename<<" does not exist."<<std::endl;
        config_->file_.release();
        return;
    }
}

Config::~Config()
{
    if ( file_.isOpened() )
        file_.release();
}

shared_ptr<Config> Config::config_ = nullptr;

}
5)、在src文件夹下创建map.cpp文件,文件内容如下所示:
#include "myslam/map.h"

namespace myslam
{

void Map::insertKeyFrame ( Frame::Ptr frame )
{
    cout<<"Key frame size = "<<keyframes_.size()<<endl;
    if ( keyframes_.find(frame->id_) == keyframes_.end() )
    {
        keyframes_.insert( make_pair(frame->id_, frame) );
    }
    else
    {
        keyframes_[ frame->id_ ] = frame;
    }
}

void Map::insertMapPoint ( MapPoint::Ptr map_point )
{
    if ( map_points_.find(map_point->id_) == map_points_.end() )
    {
        map_points_.insert( make_pair(map_point->id_, map_point) );
    }
    else
    {
        map_points_[map_point->id_] = map_point;
    }
}


}
6)、在src文件夹下创建mappoint.cpp文件,文件内容如下所示:
#include "myslam/common_include.h"
#include "myslam/mapPoint.h"
namespace myslam
{
MapPoint::MapPoint()
: id_(-1), pos_(Vector3d(0,0,0)), norm_(Vector3d(0,0,0)), observed_times_(0)
{

}

MapPoint::MapPoint ( long id, Vector3d position, Vector3d norm )
: id_(id), pos_(position), norm_(norm), observed_times_(0)
{

}

MapPoint::Ptr MapPoint::createMapPoint()
{
    static long factory_id = 0;
    return MapPoint::Ptr(
        new MapPoint( factory_id++, Vector3d(0,0,0), Vector3d(0,0,0) )
    );
}

}
7)、在src文件夹下创建visual_odometry.cpp文件,文件内容如下所示:
#include <opencv2/highgui/highgui.hpp>
#include <opencv2/imgproc/imgproc.hpp>
#include <opencv2/calib3d/calib3d.hpp>
#include <algorithm>
#include <boost/timer.hpp>

#include "myslam/config.h"
#include "myslam/visual_odometry.h"

namespace myslam
{

VisualOdometry::VisualOdometry() :
    state_ ( INITIALIZING ), ref_ ( nullptr ), curr_ ( nullptr ), map_ ( new Map ), num_lost_ ( 0 ), num_inliers_ ( 0 )
{
    num_of_features_    = Config::get<int> ( "number_of_features" );
    scale_factor_       = Config::get<double> ( "scale_factor" );
    level_pyramid_      = Config::get<int> ( "level_pyramid" );
    match_ratio_        = Config::get<float> ( "match_ratio" );
    max_num_lost_       = Config::get<float> ( "max_num_lost" );
    min_inliers_        = Config::get<int> ( "min_inliers" );
    key_frame_min_rot   = Config::get<double> ( "keyframe_rotation" );
    key_frame_min_trans = Config::get<double> ( "keyframe_translation" );
    orb_ = cv::ORB::create ( num_of_features_, scale_factor_, level_pyramid_ );
}

VisualOdometry::~VisualOdometry()
{

}

bool VisualOdometry::addFrame ( Frame::Ptr frame )
{
    switch ( state_ )
    {
    case INITIALIZING:
    {
        state_ = OK;
        curr_ = ref_ = frame;
        map_->insertKeyFrame ( frame );
        // extract features from first frame
        extractKeyPoints();
        computeDescriptors();
        // compute the 3d position of features in ref frame
        setRef3DPoints();
        break;
    }
    case OK:
    {
        curr_ = frame;
        extractKeyPoints();
        computeDescriptors();
        featureMatching();
        poseEstimationPnP();
        if ( checkEstimatedPose() == true ) // a good estimation
        {
            curr_->T_c_w_ = T_c_r_estimated_ * ref_->T_c_w_;  // T_c_w = T_c_r*T_r_w
            ref_ = curr_;
            setRef3DPoints();
            num_lost_ = 0;
            if ( checkKeyFrame() == true ) // is a key-frame
            {
                addKeyFrame();
            }
        }
        else // bad estimation due to various reasons
        {
            num_lost_++;
            if ( num_lost_ > max_num_lost_ )
            {
                state_ = LOST;
            }
            return false;
        }
        break;
    }
    case LOST:
    {
        cout<<"vo has lost."<<endl;
        break;
    }
    }

    return true;
}

void VisualOdometry::extractKeyPoints()
{
    orb_->detect ( curr_->color_, keypoints_curr_ );
}

void VisualOdometry::computeDescriptors()
{
    orb_->compute ( curr_->color_, keypoints_curr_, descriptors_curr_ );
}

void VisualOdometry::featureMatching()
{
    // match desp_ref and desp_curr, use OpenCV's brute force match
    vector<cv::DMatch> matches;
    cv::BFMatcher matcher ( cv::NORM_HAMMING );
    matcher.match ( descriptors_ref_, descriptors_curr_, matches );
    // select the best matches
    float min_dis = std::min_element (
                        matches.begin(), matches.end(),
                        [] ( const cv::DMatch& m1, const cv::DMatch& m2 )
    {
        return m1.distance < m2.distance;
    } )->distance;

    feature_matches_.clear();
    for ( cv::DMatch& m : matches )
    {
        if ( m.distance < max<float> ( min_dis*match_ratio_, 30.0 ) )
        {
            feature_matches_.push_back(m);
        }
    }
    cout<<"good matches: "<<feature_matches_.size()<<endl;
}

void VisualOdometry::setRef3DPoints()
{
    // select the features with depth measurements
    pts_3d_ref_.clear();
    descriptors_ref_ = Mat();
    for ( size_t i=0; i<keypoints_curr_.size(); i++ )
    {
        double d = ref_->findDepth(keypoints_curr_[i]);
        if ( d > 0)
        {
            Vector3d p_cam = ref_->camera_->pixel2camera(
                Vector2d(keypoints_curr_[i].pt.x, keypoints_curr_[i].pt.y), d
            );
            pts_3d_ref_.push_back( cv::Point3f( p_cam(0,0), p_cam(1,0), p_cam(2,0) ));
            descriptors_ref_.push_back(descriptors_curr_.row(i));
        }
    }
}

void VisualOdometry::poseEstimationPnP()
{
    // construct the 3d 2d observations
    vector<cv::Point3f> pts3d;
    vector<cv::Point2f> pts2d;

    for ( cv::DMatch m:feature_matches_ )
    {
        pts3d.push_back( pts_3d_ref_[m.queryIdx] );
        pts2d.push_back( keypoints_curr_[m.trainIdx].pt );
    }

    Mat K = ( cv::Mat_<double>(3,3)<<
        ref_->camera_->fx_, 0, ref_->camera_->cx_,
        0, ref_->camera_->fy_, ref_->camera_->cy_,
        0,0,1
    );
    Mat rvec, tvec, inliers;
    cv::solvePnPRansac( pts3d, pts2d, K, Mat(), rvec, tvec, false, 100, 4.0, 0.99, inliers );
    num_inliers_ = inliers.rows;
    cout<<"pnp inliers: "<<num_inliers_<<endl;
    T_c_r_estimated_ = SE3(
        SO3(rvec.at<double>(0,0), rvec.at<double>(1,0), rvec.at<double>(2,0)),
        Vector3d( tvec.at<double>(0,0), tvec.at<double>(1,0), tvec.at<double>(2,0))
    );
}

bool VisualOdometry::checkEstimatedPose()
{
    // check if the estimated pose is good
    if ( num_inliers_ < min_inliers_ )
    {
        cout<<"reject because inlier is too small: "<<num_inliers_<<endl;
        return false;
    }
    // if the motion is too large, it is probably wrong
    Sophus::Vector6d d = T_c_r_estimated_.log();
    if ( d.norm() > 5.0 )
    {
        cout<<"reject because motion is too large: "<<d.norm()<<endl;
        return false;
    }
    return true;
}

bool VisualOdometry::checkKeyFrame()
{
    Sophus::Vector6d d = T_c_r_estimated_.log();
    Vector3d trans = d.head<3>();
    Vector3d rot = d.tail<3>();
    if ( rot.norm() >key_frame_min_rot || trans.norm() >key_frame_min_trans )
        return true;
    return false;
}

void VisualOdometry::addKeyFrame()
{
    cout<<"adding a key-frame"<<endl;
    map_->insertKeyFrame ( curr_ );
}

}
8)、在src文件夹下创建CMakeLists.txt文件,文件内容如下所示:
add_library( myslam SHARED
    frame.cpp
    mappoint.cpp
    map.cpp
    camera.cpp
    config.cpp
    visual_odometry.cpp
)

target_link_libraries( myslam
    ${THIRD_PARTY_LIBS}
)
9)、src中整体项目概览如下:

7、新建test文件夹
1)、test文件夹的创建,这时候,vo项目中有7个模块了:
 2)、在test文件夹下创建run_vo.cpp文件,文件内容如下所示:
// -------------- test the visual odometry -------------
#include <fstream>
#include <boost/timer.hpp>
#include <opencv2/imgcodecs.hpp>
#include <opencv2/highgui/highgui.hpp>
#include <opencv2/viz.hpp>

#include "myslam/config.h"
#include "myslam/visual_odometry.h"

int main ( int argc, char** argv )
{
    if ( argc != 2 )
    {
        cout<<"usage: run_vo parameter_file"<<endl;
        return 1;
    }

    myslam::Config::setParameterFile ( argv[1] );
    myslam::VisualOdometry::Ptr vo ( new myslam::VisualOdometry );

    string dataset_dir = myslam::Config::get<string> ( "dataset_dir" );
    cout<<"dataset: "<<dataset_dir<<endl;
    ifstream fin ( dataset_dir+"/associate.txt" );
    if ( !fin )
    {
        cout<<"please generate the associate file called associate.txt!"<<endl;
        return 1;
    }

    vector<string> rgb_files, depth_files;
    vector<double> rgb_times, depth_times;
    while ( !fin.eof() )
    {
        string rgb_time, rgb_file, depth_time, depth_file;
        fin>>rgb_time>>rgb_file>>depth_time>>depth_file;
        rgb_times.push_back ( atof ( rgb_time.c_str() ) );
        depth_times.push_back ( atof ( depth_time.c_str() ) );
        rgb_files.push_back ( dataset_dir+"/"+rgb_file );
        depth_files.push_back ( dataset_dir+"/"+depth_file );

        if ( fin.good() == false )
            break;
    }

    myslam::Camera::Ptr camera ( new myslam::Camera );

    // visualization
    cv::viz::Viz3d vis("Visual Odometry");
    cv::viz::WCoordinateSystem world_coor(1.0), camera_coor(0.5);
    cv::Point3d cam_pos( 0, -1.0, -1.0 ), cam_focal_point(0,0,0), cam_y_dir(0,1,0);
    cv::Affine3d cam_pose = cv::viz::makeCameraPose( cam_pos, cam_focal_point, cam_y_dir );
    vis.setViewerPose( cam_pose );

    world_coor.setRenderingProperty(cv::viz::LINE_WIDTH, 2.0);
    camera_coor.setRenderingProperty(cv::viz::LINE_WIDTH, 1.0);
    vis.showWidget( "World", world_coor );
    vis.showWidget( "Camera", camera_coor );

    cout<<"read total "<<rgb_files.size() <<" entries"<<endl;
    for ( int i=0; i<rgb_files.size(); i++ )
    {
        Mat color = cv::imread ( rgb_files[i] );
        Mat depth = cv::imread ( depth_files[i], -1 );
        if ( color.data==nullptr || depth.data==nullptr )
            break;
        myslam::Frame::Ptr pFrame = myslam::Frame::createFrame();
        pFrame->camera_ = camera;
        pFrame->color_ = color;
        pFrame->depth_ = depth;
        pFrame->time_stamp_ = rgb_times[i];

        boost::timer timer;
        vo->addFrame ( pFrame );
        cout<<"VO costs time: "<<timer.elapsed()<<endl;

        if ( vo->state_ == myslam::VisualOdometry::LOST )
            break;
        SE3 Tcw = pFrame->T_c_w_.inverse();

        // show the map and the camera pose
        cv::Affine3d M(
            cv::Affine3d::Mat3(
                Tcw.rotation_matrix()(0,0), Tcw.rotation_matrix()(0,1), Tcw.rotation_matrix()(0,2),
                Tcw.rotation_matrix()(1,0), Tcw.rotation_matrix()(1,1), Tcw.rotation_matrix()(1,2),
                Tcw.rotation_matrix()(2,0), Tcw.rotation_matrix()(2,1), Tcw.rotation_matrix()(2,2)
            ),
            cv::Affine3d::Vec3(
                Tcw.translation()(0,0), Tcw.translation()(1,0), Tcw.translation()(2,0)
            )
        );

        cv::imshow("image", color );
        cv::waitKey(1);
        vis.setWidgetPose( "Camera", M);
        vis.spinOnce(1, false);
    }

    return 0;
}
2)、在test文件夹下创建CMakeLists.txt文件,文件内容如下所示:
add_executable( run_vo run_vo.cpp )
target_link_libraries( run_vo myslam )
3)、test文件夹下项目概览如下:

8、编写VO项目的CMakeLists.txt文件
1)、在vo项目的根目录下,找到CMakeLists.txt文件,写入如下配置内容
cmake_minimum_required( VERSION 2.8 )
project ( myslam )

set( CMAKE_CXX_COMPILER "g++" )
set( CMAKE_BUILD_TYPE "Release" )
set( CMAKE_CXX_FLAGS "-std=c++11 -march=native -O3" )

list( APPEND CMAKE_MODULE_PATH ${PROJECT_SOURCE_DIR}/cmake_modules )
set( EXECUTABLE_OUTPUT_PATH ${PROJECT_SOURCE_DIR}/bin )
set( LIBRARY_OUTPUT_PATH ${PROJECT_SOURCE_DIR}/lib )

############### dependencies ######################
# Eigen
include_directories( "/usr/include/eigen3" )
# OpenCV
find_package( OpenCV 3.1 REQUIRED )
include_directories( ${OpenCV_INCLUDE_DIRS} )
# Sophus
find_package( Sophus REQUIRED )
include_directories( ${Sophus_INCLUDE_DIRS} )
# G2O
find_package( G2O REQUIRED )
include_directories( ${G2O_INCLUDE_DIRS} )

set( THIRD_PARTY_LIBS
    ${OpenCV_LIBS}
    ${Sophus_LIBRARIES}
    g2o_core g2o_stuff g2o_types_sba
)
############### source and test ######################
include_directories( ${PROJECT_SOURCE_DIR}/include )
add_subdirectory( src )
add_subdirectory( test )
四、项目编译的两种方法
1、KDevelo客户端编译
1)、点击build编译按钮
 2)、编译结果

2、终端编译
1)、终端进入vo,新建build文件夹,进入编译
cd vo
mkdir build
cd build
cmake ..
make -j8
2)、编译结果
 以上两种方法人选择其中一种就ok!
3、进入TUM数据集,生成配对文件 associate.txt
1)、创建associate.py文件
#!/usr/bin/python
# Software License Agreement (BSD License)
#
# Copyright (c) 2013, Juergen Sturm, TUM
# All rights reserved.
#
# Redistribution and use in source and binary forms, with or without
# modification, are permitted provided that the following conditions
# are met:
#
#  * Redistributions of source code must retain the above copyright
#    notice, this list of conditions and the following disclaimer.
#  * Redistributions in binary form must reproduce the above
#    copyright notice, this list of conditions and the following
#    disclaimer in the documentation and/or other materials provided
#    with the distribution.
#  * Neither the name of TUM nor the names of its
#    contributors may be used to endorse or promote products derived
#    from this software without specific prior written permission.
#
# THIS SOFTWARE IS PROVIDED BY THE COPYRIGHT HOLDERS AND CONTRIBUTORS
# "AS IS" AND ANY EXPRESS OR IMPLIED WARRANTIES, INCLUDING, BUT NOT
# LIMITED TO, THE IMPLIED WARRANTIES OF MERCHANTABILITY AND FITNESS
# FOR A PARTICULAR PURPOSE ARE DISCLAIMED. IN NO EVENT SHALL THE
# COPYRIGHT OWNER OR CONTRIBUTORS BE LIABLE FOR ANY DIRECT, INDIRECT,
# INCIDENTAL, SPECIAL, EXEMPLARY, OR CONSEQUENTIAL DAMAGES (INCLUDING,
# BUT NOT LIMITED TO, PROCUREMENT OF SUBSTITUTE GOODS OR SERVICES;
# LOSS OF USE, DATA, OR PROFITS; OR BUSINESS INTERRUPTION) HOWEVER
# CAUSED AND ON ANY THEORY OF LIABILITY, WHETHER IN CONTRACT, STRICT
# LIABILITY, OR TORT (INCLUDING NEGLIGENCE OR OTHERWISE) ARISING IN
# ANY WAY OUT OF THE USE OF THIS SOFTWARE, EVEN IF ADVISED OF THE
# POSSIBILITY OF SUCH DAMAGE.
#
# Requirements:
# sudo apt-get install python-argparse

"""
The Kinect provides the color and depth images in an un-synchronized way. This means that the set of time stamps from the color images do not intersect with those of the depth images. Therefore, we need some way of associating color images to depth images.

For this purpose, you can use the ''associate.py'' script. It reads the time stamps from the rgb.txt file and the depth.txt file, and joins them by finding the best matches.
"""

import argparse
import sys
import os
import numpy


def read_file_list(filename):
    """
    Reads a trajectory from a text file.

    File format:
    The file format is "stamp d1 d2 d3 ...", where stamp denotes the time stamp (to be matched)
    and "d1 d2 d3.." is arbitary data (e.g., a 3D position and 3D orientation) associated to this timestamp.

    Input:
    filename -- File name

    Output:
    dict -- dictionary of (stamp,data) tuples

    """
    file = open(filename)
    data = file.read()
    lines = data.replace(","," ").replace("\t"," ").split("\n")
    list = [[v.strip() for v in line.split(" ") if v.strip()!=""] for line in lines if len(line)>0 and line[0]!="#"]
    list = [(float(l[0]),l[1:]) for l in list if len(l)>1]
    return dict(list)

def associate(first_list, second_list,offset,max_difference):
    """
    Associate two dictionaries of (stamp,data). As the time stamps never match exactly, we aim
    to find the closest match for every input tuple.

    Input:
    first_list -- first dictionary of (stamp,data) tuples
    second_list -- second dictionary of (stamp,data) tuples
    offset -- time offset between both dictionaries (e.g., to model the delay between the sensors)
    max_difference -- search radius for candidate generation

    Output:
    matches -- list of matched tuples ((stamp1,data1),(stamp2,data2))

    """
    first_keys = first_list.keys()
    second_keys = second_list.keys()
    potential_matches = [(abs(a - (b + offset)), a, b)
                         for a in first_keys
                         for b in second_keys
                         if abs(a - (b + offset)) < max_difference]
    potential_matches.sort()
    matches = []
    for diff, a, b in potential_matches:
        if a in first_keys and b in second_keys:
            first_keys.remove(a)
            second_keys.remove(b)
            matches.append((a, b))

    matches.sort()
    return matches

if __name__ == '__main__':

    # parse command line
    parser = argparse.ArgumentParser(description='''
    This script takes two data files with timestamps and associates them
    ''')
    parser.add_argument('first_file', help='first text file (format: timestamp data)')
    parser.add_argument('second_file', help='second text file (format: timestamp data)')
    parser.add_argument('--first_only', help='only output associated lines from first file', action='store_true')
    parser.add_argument('--offset', help='time offset added to the timestamps of the second file (default: 0.0)',default=0.0)
    parser.add_argument('--max_difference', help='maximally allowed time difference for matching entries (default: 0.02)',default=0.02)
    args = parser.parse_args()

    first_list = read_file_list(args.first_file)
    second_list = read_file_list(args.second_file)

    matches = associate(first_list, second_list,float(args.offset),float(args.max_difference))

    if args.first_only:
        for a,b in matches:
            print("%f %s"%(a," ".join(first_list[a])))
    else:
        for a,b in matches:
            print("%f %s %f %s"%(a," ".join(first_list[a]),b-float(args.offset)," ".join(second_list[b])))
2)、生成配对文件 associate.txt
python associate.py rgb.txt depth.txt > associate.txt
 3)、生成配对文件 associate.txt如下:

五、Kdevelop配置运行环境,并运行结果
1、配置运行的可执行文件
1)、如下选择进入配置界面
 2)、添加可执行文件及参数

2、运行
1)、点击运行按钮运行结果:
 2)、运行结果如下:
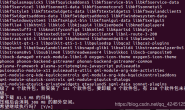
 由于给出的TUM数据集只有30张图片,所以很快运行完了 3)、终端显示结果:
 以上就是本次博客的全部内容啦,希望小伙伴们对本次博客的阅读可以帮助大家理解SLAM中的VO框架的搭建,了解VO搭建过程,并知道如何编写对应模块的文件哦! 遇到问题的小伙伴记得评论区留言,林君学长看到会为大家解答的,这个学长不太冷! 陈一月的又一天编程岁月^ _ ^