本文作者:iwande
1.为什么要介绍这个方法?
2018年的时候,D.DeTone等人发表了Self-Supervised Interest Point Detection and Description,提出了一种特征提取SuperPoint的方法。他们在训练Superpoint的时候,构造了一组人工合成数据集Synthetic Shapes dataset(这个数据集能提供角点的坐标作为groundtruth),因此也可以测试superpoint最后的效果。 所以说,Synthetic Shapes dataset它最大的优点,就是简单,而且能够提供特征点的groundtruth,这对于检测特征点十分重要! 非常不幸的是,作者不打算提供Synthetic Shapes dataset,所以,把作者相关的代码提取出来就显得十分有意义。
2.Synthetic Shapes dataset的生成
打开官方链接,找到superpoint/datasets/synthetic_dataset.py 这个路径,这个py脚本就是用来生成Synthetic Shapes dataset的!! 第一步,生成图片背景,在52行或者82行:
def generate_background(size=(960, 1280), nb_blobs=100, min_rad_ratio=0.01,
                        max_rad_ratio=0.05, min_kernel_size=50, max_kernel_size=300):
    """ Generate a customized background image
    Parameters:
      size: size of the image
      nb_blobs: number of circles to draw
      min_rad_ratio: the radius of blobs is at least min_rad_size * max(size)
      max_rad_ratio: the radius of blobs is at most max_rad_size * max(size)
      min_kernel_size: minimal size of the kernel
      max_kernel_size: maximal size of the kernel
    """
def generate_custom_background(size, background_color, nb_blobs=3000,
                               kernel_boundaries=(50, 100)):
    """ Generate a customized background to fill the shapes
    Parameters:
      background_color: average color of the background image
      nb_blobs: number of circles to draw
      kernel_boundaries: interval of the possible sizes of the kernel
    """
第二步,画线,得到特征点的坐标(138行):
def draw_lines(img, nb_lines=10):
    """ Draw random lines and output the positions of the endpoints
    Parameters:
      nb_lines: maximal number of lines
    """
    ...
    return points
第三步,你也可以画多边形(166行或227行):
def draw_polygon(img, max_sides=8):
    """ Draw a polygon with a random number of corners
    and return the corner points
    Parameters:
      max_sides: maximal number of sides + 1
    """
    ...
    return points
def draw_multiple_polygons(img, max_sides=8, nb_polygons=30, **extra):
    """ Draw multiple polygons with a random number of corners
    and return the corner points
    Parameters:
      max_sides: maximal number of sides + 1
      nb_polygons: maximal number of polygons
    """
    ...
    return points
第四步,你可以画星星(334行):
def draw_star(img, nb_branches=6):
    """ Draw a star and output the interest points
    Parameters:
      nb_branches: number of branches of the star
    """
    ...
    return points
画椭圆(304行):
def draw_ellipses(img, nb_ellipses=20):
    """ Draw several ellipses
    Parameters:
      nb_ellipses: maximal number of ellipses
    """
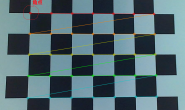
画棋盘格(362行):
def draw_checkerboard(img, max_rows=7, max_cols=7, transform_params=(0.05, 0.15)):
    """ Draw a checkerboard and output the interest points
    Parameters:
      max_rows: maximal number of rows + 1
      max_cols: maximal number of cols + 1
      transform_params: set the range of the parameters of the transformations"""
    ...
    return points
画立方体(596行):
def draw_cube(img, min_size_ratio=0.2, min_angle_rot=math.pi / 10,
              scale_interval=(0.4, 0.6), trans_interval=(0.5, 0.2)):
    """ Draw a 2D projection of a cube and output the corners that are visible
    Parameters:
      min_size_ratio: min(img.shape) * min_size_ratio is the smallest achievable
                      cube side size
      min_angle_rot: minimal angle of rotation
      scale_interval: the scale is between scale_interval[0] and
                      scale_interval[0]+scale_interval[1]
      trans_interval: the translation is between img.shape*trans_interval[0] and
                      img.shape*(trans_interval[0] + trans_interval[1])
    """
    ...
    return points
第五步,你还可以给图片增加颗粒感(40行):
def add_salt_and_pepper(img):
    """ Add salt and pepper noise to an image """
    noise = np.zeros((img.shape[0], img.shape[1]), dtype=np.uint8)
    cv.randu(noise, 0, 255)
    black = noise < 30
    white = noise > 225
    img[white > 0] = 255
    img[black > 0] = 0
    cv.blur(img, (5, 5), img)
    return np.empty((0, 2), dtype=np.int)
或者gauss噪声(104行或683行):
def final_blur(img, kernel_size=(5, 5)):
    """ Apply a final Gaussian blur to the image
    Parameters:
      kernel_size: size of the kernel
    """
    cv.GaussianBlur(img, kernel_size, 0, img)
def gaussian_noise(img):
    """ Apply random noise to the image """
    cv.randu(img, 0, 255)
    return np.empty((0, 2), dtype=np.int)


