前面的文章使用Asp.net core 5.0以及IdentityServer4搭建了一个基础的验证服务器,并实现了基于客户端证书的Oauth2.0授权流程,以及通过access token访问被保护资源,本文将继续完善IdentityServer实现与Identity组件的集成,可使用Identity的用户来完成授权。
- 集成Asp.net core Identity与元包(MetaPackage)
- Asp.net core Identity数据持久化
- Asp.net core Identity UI
- Asp.net core Identity与IdentityServer4集成
- 小结
集成Asp.net core Identity
在软件领域中只要提到身份验证就能想到登录,而登录往往与用户名和密码相关联,IdentityServer4或者说OAuth2.0和OpenIDConnect也是一样的,它需要用户数据来支持完成相关的验证及授权操作,下面我们就先来实现IdentityServer4的用户数据接入及与用户数据相关的授权流程。
首先为IdentityServer添加Asp.Net core Identity模块:
Asp.net core Identity是Asp.net core的身份验证组件,它不仅包含了身份验证所需的数据及数据持久化支持,另外还提供了用户管理、登录管理等一系列的服务和UI,在创建新的Asp.net core mvc或api项目时,如果勾选身份验证选项就会默认包含该组件,但是由于文本中的例子是从零开始的,所以Identity组件也需要手动添加。
在添加Identity之前还有一个概念需要再说一下就是metapackege(元包,具体参考:https://natemcmaster.com/blog/2018/08/29/netcore-primitives-2/),它实质上是一组共享库,提供了.net core和asp.net core应用的基础运行时和基础功能,在创建项目时默认会依赖相应.net core版本的元包,而元包共享的程序集实际上在dotnet的安装目录的shared目录下,元包的好处就是在框架发布时,发布文件就不需要包含元包内容,减少发布文件大小:

而Asp.net core 5.0应用程序包含两个元包:
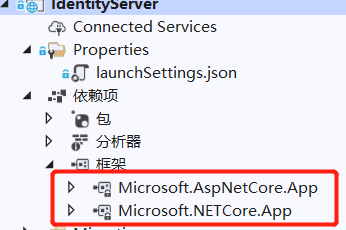
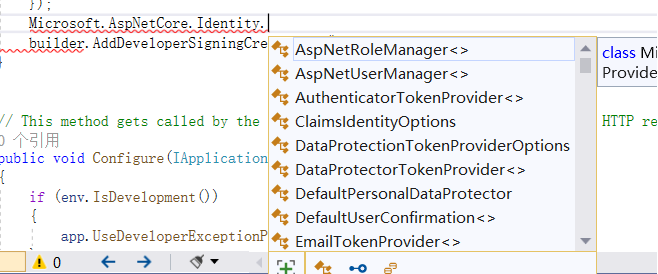
其中Microsoft.AspNetCore.App中包含了Identity的基础组件:

基础组件中已经包含了Identity的基础组件,如IdentityUser等相关的实体以及相关的服务类型/接口,所以换句话说使用Identity功能仅需要完成数据持久化及UI即可。
Asp.net core Identity数据持久化
EF core是.net core下面的首选数据持久化框架,所以同样的identity也提供了基于EF core的数据持久化组件,添加基于EF的Identity数据持久化组件:

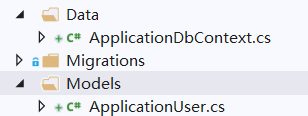
同时为了方便后续的扩展,新建一个ApplicationUser继承于IdentityUser和ApplicationDbContext继承于IdentityDbContext<ApplicationUser>:
添加Identity的数据上下文及identity服务:
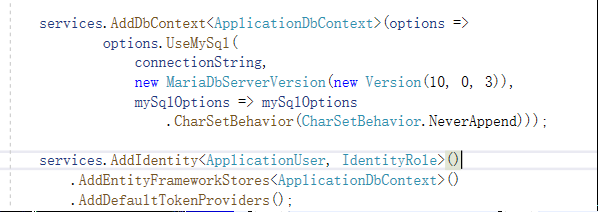
添加数据库迁移代码并更新到数据库:
Add-Migration initIdentityDb -c ApplicationDbContext -o Migrations/IdentityServer/IdentityDb
Update-Database -Context ApplicationDbContext

Asp.net core Identity UI
Identity的UI是一个Razor的类库,换句话说就是页面文件被包含在类库里面了,如果要对UI进行修改可以通过VS的构建程序构建(VS Code可参考文档:https://docs.microsoft.com/en-us/aspnet/core/security/authentication/scaffold-identity?view=aspnetcore-5.0&tabs=netcore-cli#scaffold-identity-into-an-empty-project):
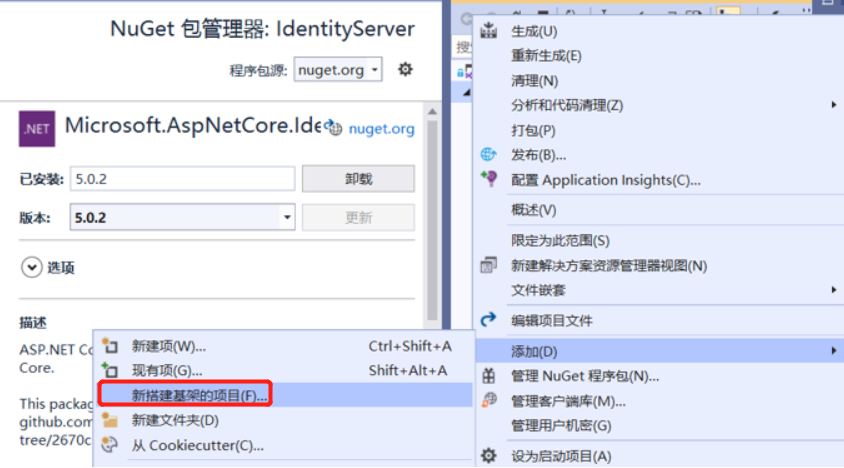
在对话框中选择“标识(Identity)”中的“标识(Identity)”选项:

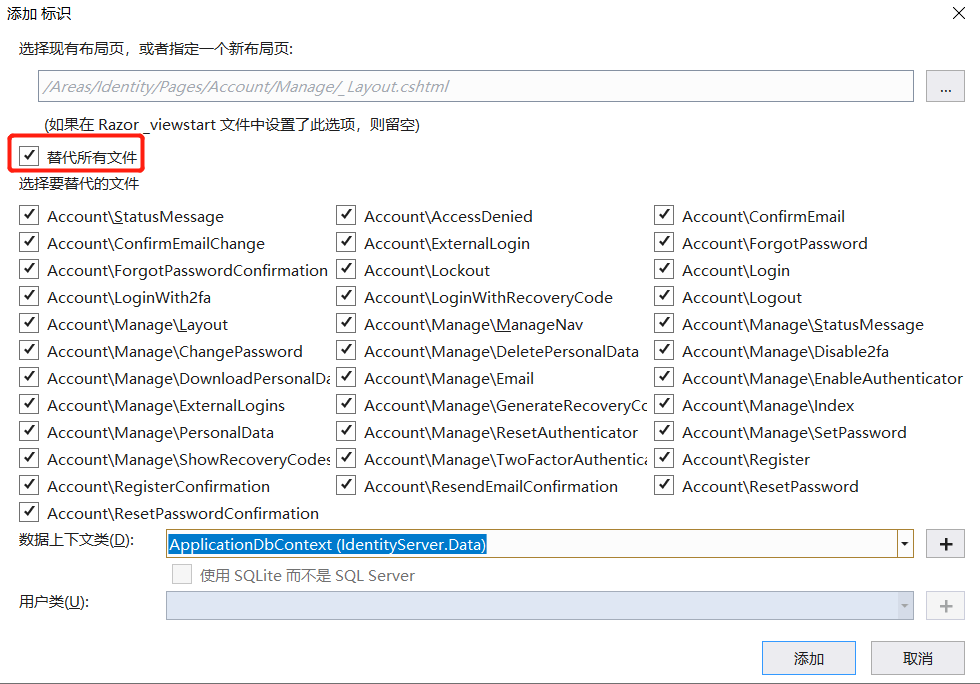
在标识对话框中勾选“替代所有文件”,布局文件没有留空即可,最后选择Identity的DbContext即可:
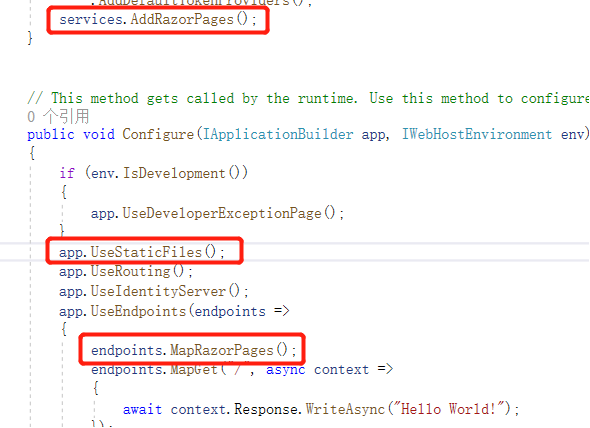
添加Razor服务、静态文件处理中间件(访问js等文件)及Razor终结点映射:
访问登录地址:https://localhost:55002/Identity/Account/Login
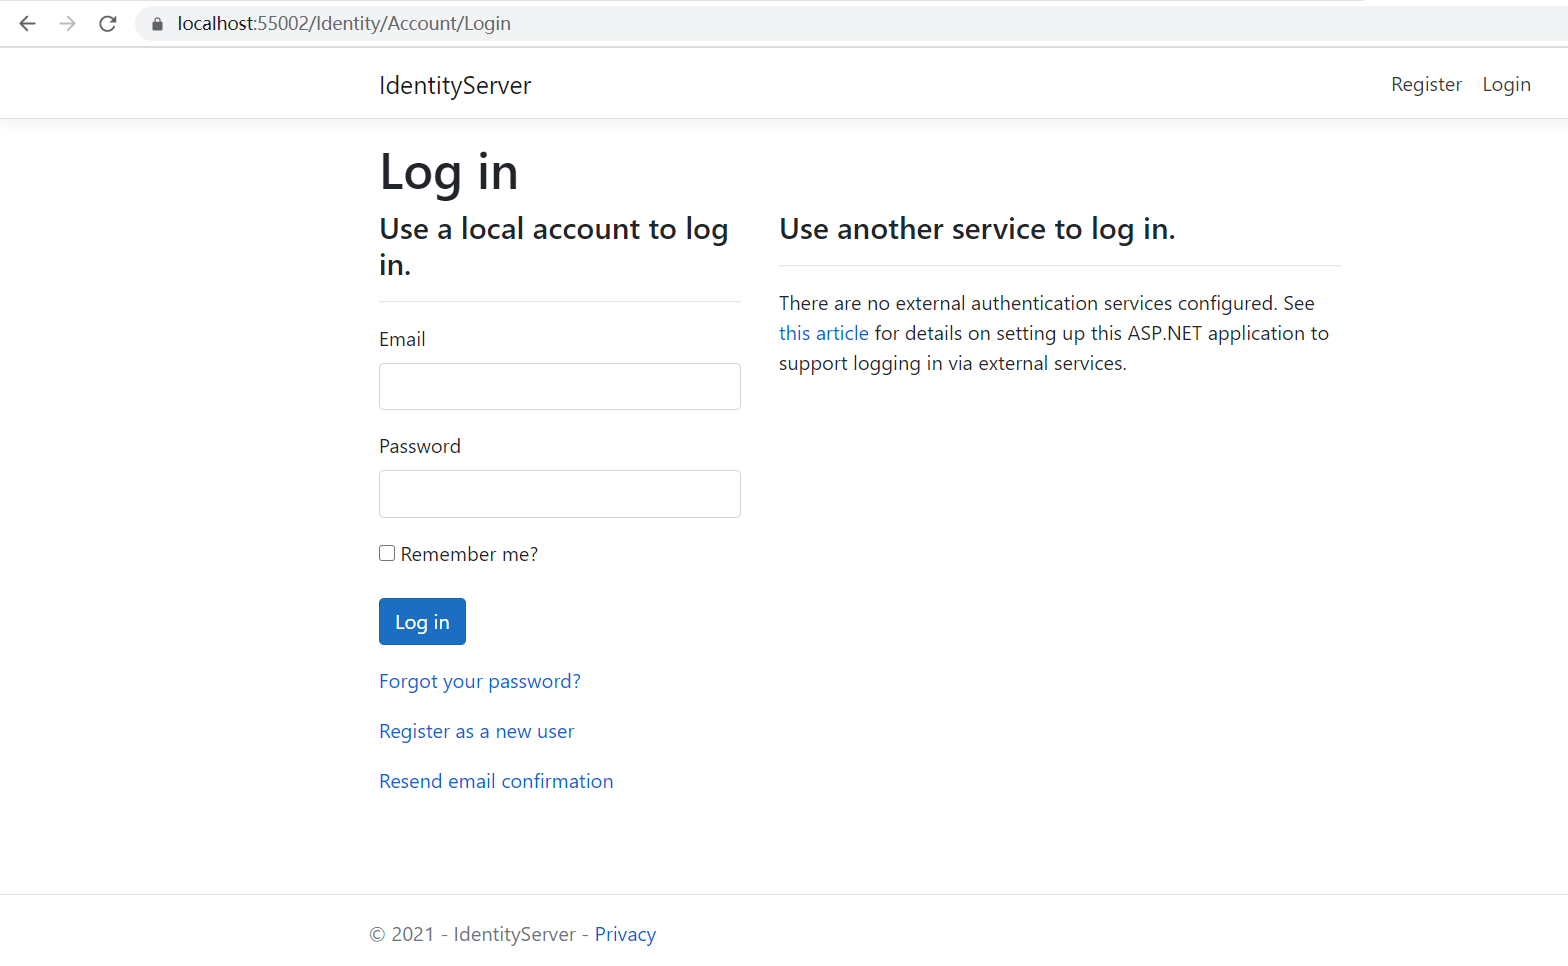
到目前为止identity的数据库和UI都已经添加到项目中并且可以运行了,但是还存在一些问题,如默认的Identity UI相关功能依赖IEmailSender组件等等,同时还需要与IdentityServer4集成,其登录、注册、登出等基础功能需要根据IdentityServer4本身的一些需求进行修改。
Asp.net core Identity与IdentityServer4集成
下面就进入IdentityServer4与Asp.net core Identity的集成工作,首先先添加IdentityServer4.AspNetIdentity组件:

然后通过IIdentityBuilder向容器中添加相关服务:
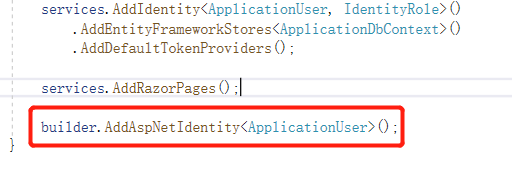
最后对修改一下Identity的注册代码,将与IEmailSender有关的代码注释掉(注:默认生成代码中包含邮件发送逻辑,但是没有EmailSender的实现,除了注释相关代码外也可以实现一个IEmailSender并注册到容器中来解决问题):

启动应用,访问注册页面注册用户:https://localhost:55002/Identity/Account/Register
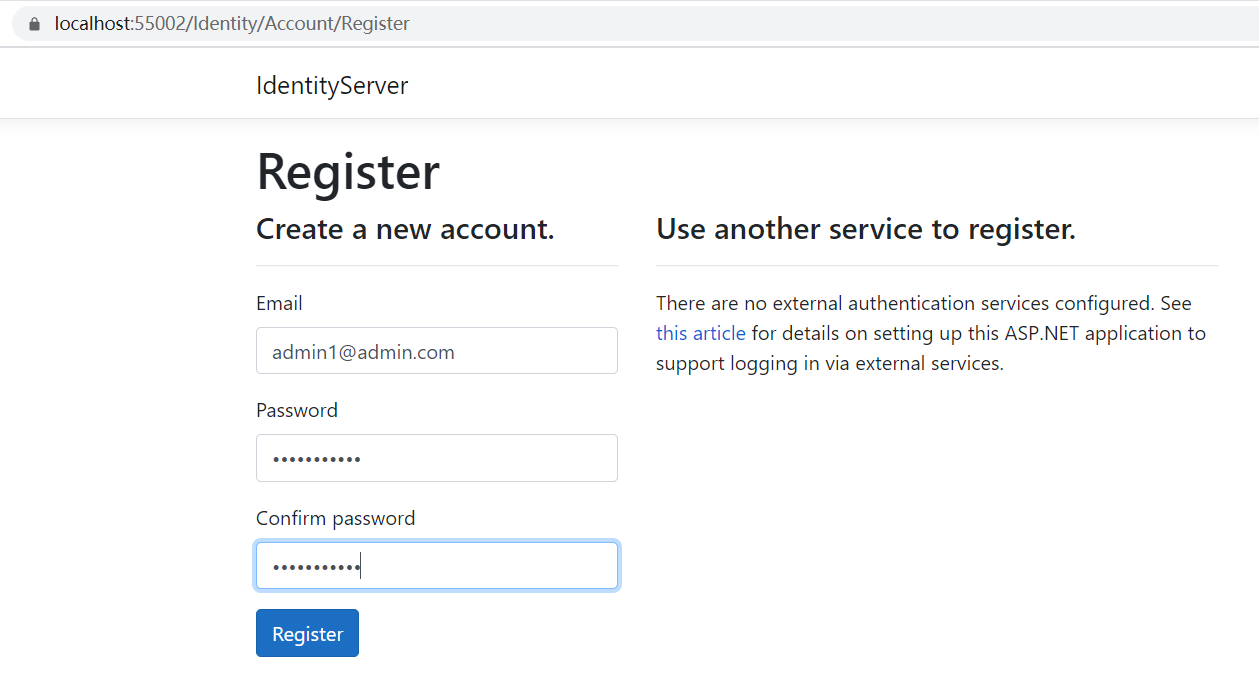
注册成功后,在数据库中为相应的client信息手动添加一条基于用户名密码的Grant Type(password),即可使用注册的用户来通过password的方式获取access token了:

以下是通过刚注册用户名密码获得的access token:
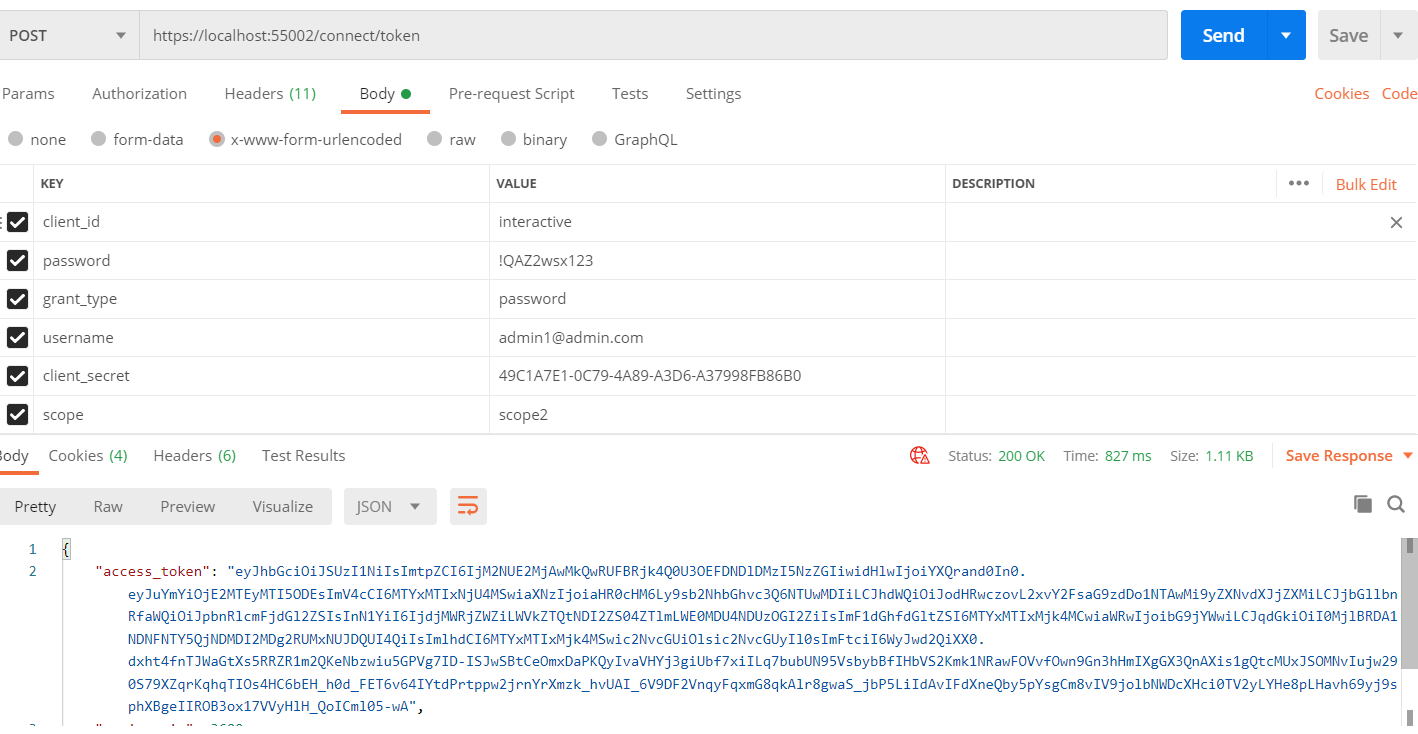
对上面的access token解码后可以看到它的payload部分包含以下信息(sub使用了用户的Id):
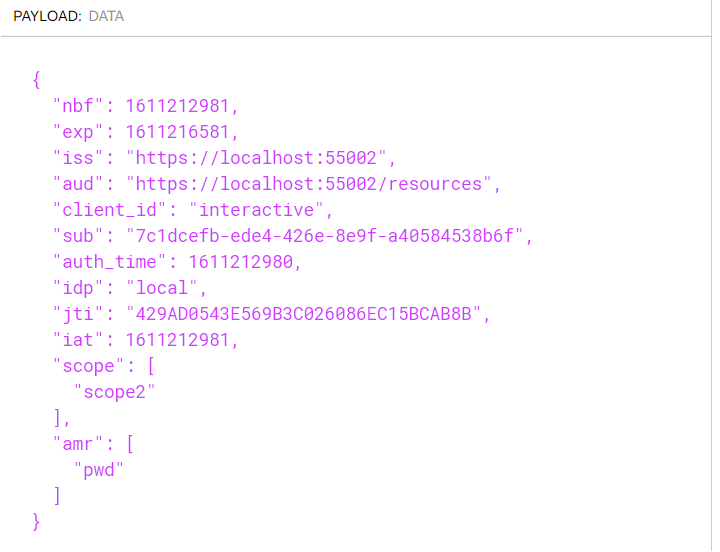
小提示:在IdentityServer4中获取Token时会根据请求对携带的Client信息以及相关参数进行验证,本例中如果Client不支持Password的Grant Type,那么会导致不支持相应的授权类型而导致无法正确获得Access Token,遇到无法正确获得Access Token或者一些验证错误的时候可以在调试模式下查看IdentityServer的输出,里面会包含相关授权成功/失败的信息。
小结
本篇文章通过集成asp.net core identity组件实现了用户管理,包括注册、登录等,并且实现了通过注册的用户,基于Oauth2.0的用户名密码模式(password grant type)来获取到Access Token,但就目前为止本系统文章所实现的、演示的IdentityServer功能仍旧是基于Oauth2.0协议,从下一篇文章开始就会开始介绍OpenIDConnect(oidc)相关的内容,此外现阶段实现的Identity登录也仅仅只是Identity本身的内容,针对OpenIDConnect或者说IdentityServer4它还有一些额外的操作,如事件、授权同意等等,这些内容也会在后续文章中不断完善。
参考:
https://docs.microsoft.com/en-us/aspnet/core/security/authentication/identity?view=aspnetcore-5.0&tabs=visual-studio
https://natemcmaster.com/blog/2018/08/29/netcore-primitives-2/
本文链接:https://www.cnblogs.com/selimsong/p/14338193.html
从零搭建一个IdentityServer——目录


