这里放了一个小强机器人的bag和我自己的bag包,以供大家测试。 链接:https://pan.baidu.com/s/1GF5FNFIKiRV3wbmBH3HwWQ 提取码:668d 前提: 1.需要三维激光启动节点,发布/points2(后面需要remap); 2.需要IMU发布imu 的相关消息 ,发布/imu(这里是我自己写的)。 注意3D需要rosbag record 记录上面两个消息,话题名自己根据自己修改,也可以 -a,记录所有的topic。
rosbag record /imu /rslidar_points
其他步骤和2D差不多:下面我直接给文件内容,看了2D,3D应该好理解很多。 资源处奉献了我的2d和3d配置文件,只需要改下urdf模型和重映射话题,就可以使用在自己的机器人上。 本文主要是大致流程,具体细节在下一个博客进行讲解,有很多小的坑,但是都是致命的。。。。 配置launch文件:myself_rslidar_3d.launch
<launch>
  <!-- <node pkg="tf" type="static_transform_publisher" name="base_laser_broadcaster" args="0 0 0 0 0 0  laserbase_footprint /base_footprint 20" /> -->
  <param name="robot_description"
    textfile="$(find cartographer_ros)/urdf/myself_robot.urdf" />

  <node name="robot_state_publisher" pkg="robot_state_publisher"
    type="robot_state_publisher" />

  <node name="cartographer_node" pkg="cartographer_ros"
      type="cartographer_node" args="
          -configuration_directory
              $(find cartographer_ros)/configuration_files
          -configuration_basename myself_rslidar_3d.lua"
      output="screen">

      <!--remap from="/odom" to="/xqserial_server/Odom" /-->
      <!--remap from="/imu" to="/imu_raw" / 如果发布的不是/imu 此处可以重映射为你的imu topic -->

      <remap from="/points2" to="/rslidar_points" />
  </node>

  <node name="cartographer_occupancy_grid_node" pkg="cartographer_ros"
      type="cartographer_occupancy_grid_node" args="-resolution 0.05" />

  <node name="rviz" pkg="rviz" type="rviz" required="true"
      args="-d $(find cartographer_ros)/configuration_files/rslidar_3d.rviz" />
</launch>
配置urdf文件:myself_robot.urdf
<robot
  name="myself_udrf">

  <link name="base_link"/>

  <link name="rslidar">
    <visual>
      <origin xyz="0 0 0" />
      <geometry>
        <cylinder length="0.05" radius="0.05" />
      </geometry>
      <material name="gray" />
    </visual>
  </link>

  <joint name="laser2link" type="fixed">
    <parent link="base_link" />
    <child link="rslidar" />
    <origin xyz="-0.25 0 0.4" rpy="0 0 0" />
  </joint>

  <link name="imu">
    <visual>
      <origin xyz="0 0 0" />
      <geometry>
        <cylinder length="0.01" radius="0.01" />
      </geometry>
      <material name="gray" />
    </visual>
  </link>

  <joint name="imu2link" type="fixed">
    <parent link="base_link" />
    <child link="imu" />
    <origin xyz="0 0 0" rpy="0 0 0" />
  </joint>
</robot>
配置lua文件:my_self_3d.lua
-- Copyright 2016 The Cartographer Authors
--
-- Licensed under the Apache License, Version 2.0 (the "License");
-- you may not use this file except in compliance with the License.
-- You may obtain a copy of the License at
--
--      http://www.apache.org/licenses/LICENSE-2.0
--
-- Unless required by applicable law or agreed to in writing, software
-- distributed under the License is distributed on an "AS IS" BASIS,
-- WITHOUT WARRANTIES OR CONDITIONS OF ANY KIND, either express or implied.
-- See the License for the specific language governing permissions and
-- limitations under the License.

include "map_builder.lua"
include "trajectory_builder.lua"

options = {
  map_builder = MAP_BUILDER,
  trajectory_builder = TRAJECTORY_BUILDER,
  map_frame = "map",
  tracking_frame = "imu",
  published_frame = "base_link",
  odom_frame = "odom",
  provide_odom_frame = true,
  publish_frame_projected_to_2d = false,
  use_odometry = false,
  use_nav_sat = false,
  use_landmarks = false,
  num_laser_scans = 0,
  num_multi_echo_laser_scans = 0,
  num_subdivisions_per_laser_scan = 1,
  num_point_clouds = 1,   ##注释这里换成1,如果你只有一个雷达的话
  lookup_transform_timeout_sec = 0.2,
  submap_publish_period_sec = 0.3,
  pose_publish_period_sec = 5e-3,
  trajectory_publish_period_sec = 30e-3,
  rangefinder_sampling_ratio = 1.,
  odometry_sampling_ratio = 1.,
  fixed_frame_pose_sampling_ratio = 1.,
  imu_sampling_ratio = 1.,
  landmarks_sampling_ratio = 1.,
}

TRAJECTORY_BUILDER_3D.num_accumulated_range_data = 1  #这里要修改为1

MAP_BUILDER.use_trajectory_builder_3d = true
MAP_BUILDER.num_background_threads = 7
POSE_GRAPH.optimization_problem.huber_scale = 5e2
POSE_GRAPH.optimize_every_n_nodes = 320
POSE_GRAPH.constraint_builder.sampling_ratio = 0.03
POSE_GRAPH.optimization_problem.ceres_solver_options.max_num_iterations = 10
POSE_GRAPH.constraint_builder.min_score = 0.62
POSE_GRAPH.constraint_builder.global_localization_min_score = 0.66

return options
配置rviz文件:demo_3d.rviz这里使用的官方的
# Copyright 2016 The Cartographer Authors
#
# Licensed under the Apache License, Version 2.0 (the "License");
# you may not use this file except in compliance with the License.
# You may obtain a copy of the License at
#
#      http://www.apache.org/licenses/LICENSE-2.0
#
# Unless required by applicable law or agreed to in writing, software
# distributed under the License is distributed on an "AS IS" BASIS,
# WITHOUT WARRANTIES OR CONDITIONS OF ANY KIND, either express or implied.
# See the License for the specific language governing permissions and
# limitations under the License.

Panels:
  - Class: rviz/Displays
    Help Height: 78
    Name: Displays
    Property Tree Widget:
      Expanded:
        - /Global Options1
        - /Submaps1
        - /PointCloud23
        - /PointCloud23/Autocompute Value Bounds1
      Splitter Ratio: 0.600671
    Tree Height: 817
  - Class: rviz/Selection
    Name: Selection
  - Class: rviz/Tool Properties
    Expanded:
      - /2D Pose Estimate1
      - /2D Nav Goal1
      - /Publish Point1
    Name: Tool Properties
    Splitter Ratio: 0.588679
  - Class: rviz/Views
    Expanded:
      - /Current View1
    Name: Views
    Splitter Ratio: 0.5
  - Class: rviz/Time
    Experimental: false
    Name: Time
    SyncMode: 0
    SyncSource: PointCloud2
Visualization Manager:
  Class: ""
  Displays:
    - Alpha: 0.5
      Cell Size: 1
      Class: rviz/Grid
      Color: 160; 160; 164
      Enabled: true
      Line Style:
        Line Width: 0.03
        Value: Lines
      Name: Grid
      Normal Cell Count: 0
      Offset:
        X: 0
        Y: 0
        Z: 0
      Plane: XY
      Plane Cell Count: 100
      Reference Frame: <Fixed Frame>
      Value: true
    - Class: rviz/TF
      Enabled: true
      Frame Timeout: 15
      Frames:
        All Enabled: true
        base_link:
          Value: true
        horizontal_vlp16_link:
          Value: true
        imu_link:
          Value: true
        map:
          Value: true
        odom:
          Value: true
        vertical_vlp16_link:
          Value: true
      Marker Scale: 1
      Name: TF
      Show Arrows: true
      Show Axes: true
      Show Names: true
      Tree:
        map:
          odom:
            base_link:
              horizontal_vlp16_link:
                {}
              imu_link:
                {}
              vertical_vlp16_link:
                {}
      Update Interval: 0
      Value: true
    - Alpha: 1
      Class: rviz/RobotModel
      Collision Enabled: false
      Enabled: true
      Links:
        All Links Enabled: true
        Expand Joint Details: false
        Expand Link Details: false
        Expand Tree: false
        Link Tree Style: Links in Alphabetic Order
        base_link:
          Alpha: 1
          Show Axes: false
          Show Trail: false
        horizontal_vlp16_link:
          Alpha: 1
          Show Axes: false
          Show Trail: false
          Value: true
        imu_link:
          Alpha: 1
          Show Axes: false
          Show Trail: false
          Value: true
        vertical_vlp16_link:
          Alpha: 1
          Show Axes: false
          Show Trail: false
          Value: true
      Name: RobotModel
      Robot Description: robot_description
      TF Prefix: ""
      Update Interval: 0
      Value: true
      Visual Enabled: true
    - Alpha: 1
      Autocompute Intensity Bounds: true
      Autocompute Value Bounds:
        Max Value: 7.6265
        Min Value: 5.66667
        Value: true
      Axis: Z
      Channel Name: intensity
      Class: rviz/PointCloud2
      Color: 20; 220; 20
      Color Transformer: FlatColor
      Decay Time: 0.1
      Enabled: false
      Invert Rainbow: false
      Max Color: 255; 255; 255
      Max Intensity: 4096
      Min Color: 0; 0; 0
      Min Intensity: 0
      Name: PointCloud2
      Position Transformer: XYZ
      Queue Size: 200
      Selectable: true
      Size (Pixels): 3
      Size (m): 0.03
      Style: Flat Squares
      Topic: /horizontal_laser_3d
      Unreliable: false
      Use Fixed Frame: true
      Use rainbow: true
      Value: false
    - Alpha: 1
      Autocompute Intensity Bounds: true
      Autocompute Value Bounds:
        Max Value: 5.6087
        Min Value: 3.77875
        Value: true
      Axis: Z
      Channel Name: intensity
      Class: rviz/PointCloud2
      Color: 240; 220; 20
      Color Transformer: FlatColor
      Decay Time: 0.1
      Enabled: false
      Invert Rainbow: true
      Max Color: 255; 255; 255
      Max Intensity: 4096
      Min Color: 0; 0; 0
      Min Intensity: 0
      Name: PointCloud2
      Position Transformer: XYZ
      Queue Size: 200
      Selectable: true
      Size (Pixels): 3
      Size (m): 0.03
      Style: Flat Squares
      Topic: /vertical_laser_3d
      Unreliable: false
      Use Fixed Frame: true
      Use rainbow: true
      Value: false
    - Class: Submaps
      Enabled: true
      Name: Submaps
      Submap query service: /submap_query
      Topic: /submap_list
      Tracking frame: base_link
      Unreliable: false
      Value: true
    - Alpha: 1
      Autocompute Intensity Bounds: true
      Autocompute Value Bounds:
        Max Value: 10
        Min Value: -10
        Value: false
      Axis: Z
      Channel Name: intensity
      Class: rviz/PointCloud2
      Color: 0; 255; 0
      Color Transformer: AxisColor
      Decay Time: 0
      Enabled: true
      Invert Rainbow: false
      Max Color: 255; 255; 255
      Max Intensity: 4096
      Min Color: 0; 0; 0
      Min Intensity: 0
      Name: PointCloud2
      Position Transformer: XYZ
      Queue Size: 20
      Selectable: true
      Size (Pixels): 3
      Size (m): 0.05
      Style: Flat Squares
      Topic: /scan_matched_points2
      Unreliable: false
      Use Fixed Frame: true
      Use rainbow: true
      Value: true
    - Class: rviz/MarkerArray
      Enabled: true
      Marker Topic: /trajectory_node_list
      Name: Trajectories
      Namespaces:
        "": true
      Queue Size: 100
      Value: true
    - Class: rviz/MarkerArray
      Enabled: true
      Marker Topic: /landmark_poses_list
      Name: Landmark Poses
      Namespaces:
        "": true
      Queue Size: 100
      Value: true
    - Class: rviz/MarkerArray
      Enabled: true
      Marker Topic: /constraint_list
      Name: Constraints
      Namespaces:
        "": true
      Queue Size: 100
      Value: true
  Enabled: true
  Global Options:
    Background Color: 100; 100; 100
    Fixed Frame: map
    Frame Rate: 30
  Name: root
  Tools:
    - Class: rviz/Interact
      Hide Inactive Objects: true
    - Class: rviz/MoveCamera
    - Class: rviz/Select
    - Class: rviz/FocusCamera
    - Class: rviz/Measure
    - Class: rviz/SetInitialPose
      Topic: /initialpose
    - Class: rviz/SetGoal
      Topic: /move_base_simple/goal
    - Class: rviz/PublishPoint
      Single click: true
      Topic: /clicked_point
  Value: true
  Views:
    Current:
      Angle: 0
      Class: rviz/TopDownOrtho
      Enable Stereo Rendering:
        Stereo Eye Separation: 0.06
        Stereo Focal Distance: 1
        Swap Stereo Eyes: false
        Value: false
      Name: Current View
      Near Clip Distance: 0.01
      Scale: 10
      Target Frame: <Fixed Frame>
      Value: TopDownOrtho (rviz)
      X: 0
      Y: 0
    Saved: ~
Window Geometry:
  Displays:
    collapsed: false
  Height: 1123
  Hide Left Dock: false
  Hide Right Dock: false
  QMainWindow State: 000000ff00000000fd0000000400000000000001c5000003c0fc0200000008fb0000001200530065006c0065006300740069006f006e00000001e10000009b0000006400fffffffb0000001e0054006f006f006c002000500072006f007000650072007400690065007302000001ed000001df00000185000000a3fb000000120056006900650077007300200054006f006f02000001df000002110000018500000122fb000000200054006f006f006c002000500072006f0070006500720074006900650073003203000002880000011d000002210000017afb000000100044006900730070006c0061007900730100000041000003c0000000dd00fffffffb0000002000730065006c0065006300740069006f006e00200062007500660066006500720200000138000000aa0000023a00000294fb00000014005700690064006500530074006500720065006f02000000e6000000d2000003ee0000030bfb0000000c004b0069006e0065006300740200000186000001060000030c00000261000000010000010f000003c0fc0200000003fb0000001e0054006f006f006c002000500072006f00700065007200740069006500730100000041000000780000000000000000fb0000000a005600690065007700730100000041000003c0000000b000fffffffb0000001200530065006c0065006300740069006f006e010000025a000000b200000000000000000000000200000490000000a9fc0100000001fb0000000a00560069006500770073030000004e00000080000002e100000197000000030000077e0000003efc0100000002fb0000000800540069006d006501000000000000077e000002f600fffffffb0000000800540069006d006501000000000000045000000000000000000000049e000003c000000004000000040000000800000008fc0000000100000002000000010000000a0054006f006f006c00730100000000ffffffff0000000000000000
  Selection:
    collapsed: false
  Time:
    collapsed: false
  Tool Properties:
    collapsed: false
  Views:
    collapsed: false
  Width: 1918
  X: 0
  Y: 24
用assets_writer_myself_3d.launch和assets_writer_myself_3d.lua 这里复制原始的assets_write一份,然后重命名,修改里面的urdf文件路径到自己的路径,然后就是一个lua文件,我没改多少,不过在后面出图会出多个视角的图,到时候不需要删了就行,其他都没啥的了。
<launch>
  <node name="cartographer_assets_writer" pkg="cartographer_ros" required="true"
      type="cartographer_assets_writer" args="
          -configuration_directory $(find cartographer_ros)/configuration_files
          -configuration_basename assets_writer_myself_3d.lua
          -urdf_filename $(find cartographer_ros)/urdf/myself_robot.urdf
          -bag_filenames $(arg bag_filenames)
          -pose_graph_filename $(arg pose_graph_filename)"
      output="screen">
  </node>
</launch>
VOXEL_SIZE = 5e-2

include "transform.lua"

options = {
  tracking_frame = "imu", #这里的frame和建图的lua一致
  pipeline = {
    {
      action = "min_max_range_filter",
      min_range = 1.,
      max_range = 20., #设置范围,这个注释记得删,不知道注释格式就用#开头了
    },
    {
      action = "dump_num_points",
    },
    {
      action = "fixed_ratio_sampler",
      sampling_ratio = 0.01,
    },

    {
      action = "write_ply",
      filename = "points.ply"
    },

    -- Gray X-Rays. These only use geometry to color pixels.
    {
      action = "write_xray_image",
      voxel_size = VOXEL_SIZE,
      filename = "xray_yz_all",
      transform = YZ_TRANSFORM,
    },
    {
      action = "write_xray_image",
      voxel_size = VOXEL_SIZE,
      filename = "xray_xy_all",
      transform = XY_TRANSFORM,
    },
    {
      action = "write_xray_image",
      voxel_size = VOXEL_SIZE,
      filename = "xray_xz_all",
      transform = XZ_TRANSFORM,
    },

    -- Now we recolor our points by frame and write another batch of X-Rays. It
    -- is visible in them what was seen by the horizontal and the vertical
    -- laser.
    {
      action = "color_points",
      frame_id = "rslidar",
      color = { 255., 0., 0. },
    },

    {
      action = "write_xray_image",
      voxel_size = VOXEL_SIZE,
      filename = "xray_yz_all_color",
      transform = YZ_TRANSFORM,
    },
    {
      action = "write_xray_image",
      voxel_size = VOXEL_SIZE,
      filename = "xray_xy_all_color",
      transform = XY_TRANSFORM,
    },
    {
      action = "write_xray_image",
      voxel_size = VOXEL_SIZE,
      filename = "xray_xz_all_color",
      transform = XZ_TRANSFORM,
    },
  }
}

return options
将pbstream文件转换成ply点云文件
#假设bag文件和pbstream文件保存在了home目录
roslaunch cartographer_ros assets_writer_myself_3d.launch    bag_filenames:=${HOME}/2018-08-11-13-20-34.bag    pose_graph_filename:=${HOME}/test_3d.pbfile
等待一段时间,处理完成后命令会自动退出,此时在bag文件旁边会生成一个.bag_points.ply后缀文件,这个就是点云文件。
使用pcl工具将ply文件转换成pcd文件
sudo apt-get install pcl_tools
#在小车主机上新开一个命令终端,假设ply文件在home目录
pcl_ply2pcd your.bag_points.ply test_3d.pcd
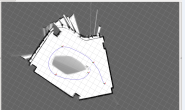
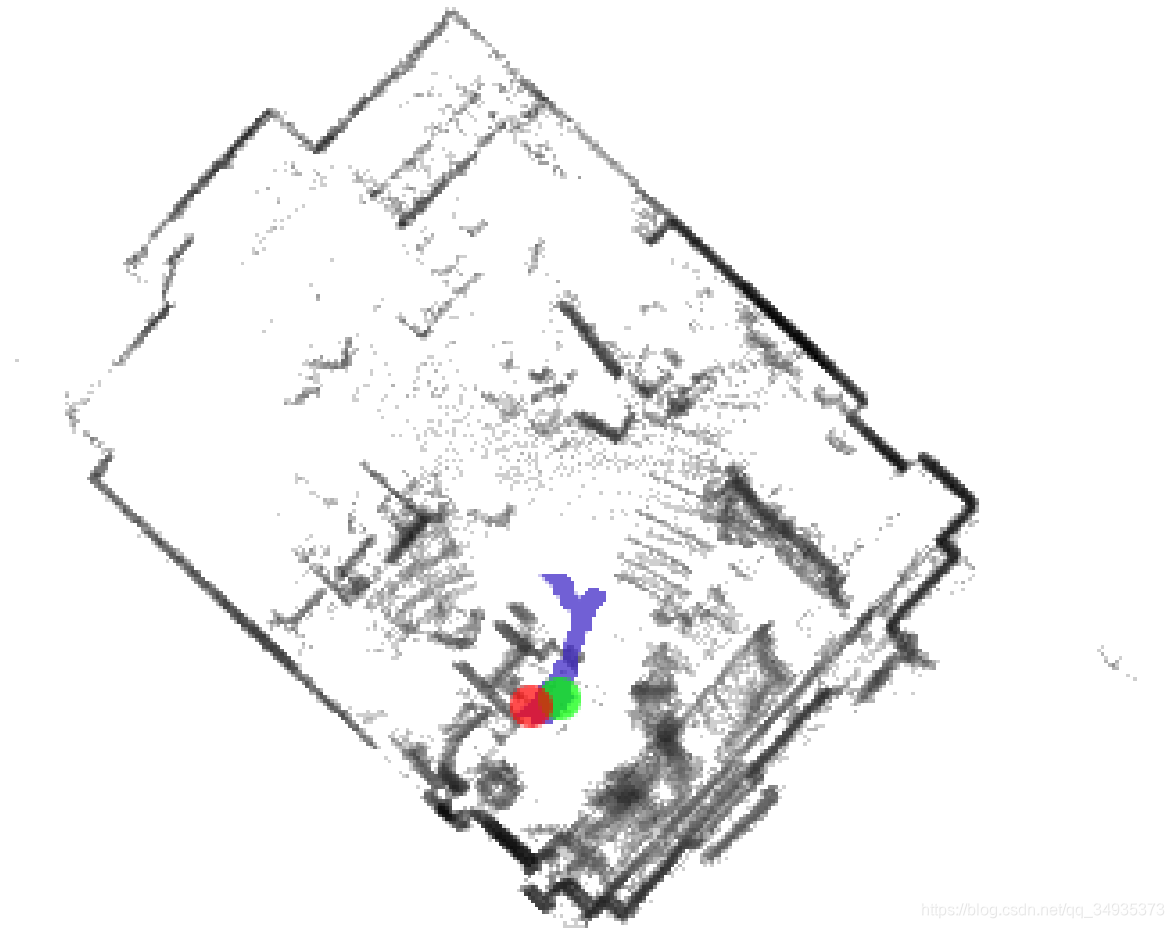
转换成功后就可以得到tes_3d.pcd文件,可以直接用pcl可视化工具查看
pcl_viewer test_3d.pcd
效果图如下: 参考:cartographer + velodyne64 + IMU建图_https://github.com/heatMa-CSDN博客_cartographer velodyne https://blog.csdn.net/u012686154/article/details/88342872